

To extend the awning you usually have to release a locking lever on the front end of the awning roller. You can usually use the same wand to do this that you will use to pull the awning down. These wands are usually made of solid steel rod about 3' long with a 90° angle about 1" long to engage the latch on one end and a loop for a handle on the other end. There are also telescoping wands to save space in your RV but mine broke the first time I tried to use it. The angle pulled right out of the tube. It may have been a manufacturing defect. The angle had grooves that could have been gripped if the tube had been compressed around it, but there was no evidence of any attempt to clamp the tube to the angle. Once you've unlocked the roller, unfasten all the clamps or pins that secure the awning arms. Sometimes there are locks that hinge around the arms; just swing them out until they allow the inside rafter to pull free. Sometimes there are spring clamps with pins that go through the arm and the rafter to keep them in place. Almost always you also need to loosen the knob that tightens the rafter in place once it is extended to allow it to slide open. When everything has been unlocked, hook the angle end of the wand in the loop in the awning strap. It should be about in the middle of the awning and barely visible under the awning roll. If you can't find it, simply pull out on the arms to get the awning to unroll. Having one person on each end will make this easier, especially on longer awnings, but it isn't absolutely necessary. If you have to do it solo you might have to go back and forth from end to end several times before you get it all the way open. Once the awning is fully unrolled, slide the ends of the rafters (which are inside the channel of each arm) up toward the roller as far as they can go and lock them in place using the knob on the rafter. Then use the handle on each arm to raise the awning to the desired height. If you're going to use de-flappers, it is usually easier to install them now before you raise the awning out of reach. The arms will usually have spring loaded buttons on the inner arm that lock into holes in the outer arm. There will be several holes so you have quite a bite of flexibility in setting the height of the awning. Make sure it is high enough to clear the entry door. Most awnings are made so you can disconnect the bottom of the arms from the side of the RV if you want to use it in "patio" mode. In this mode the arms are placed so they are perpendicular to the ground under the front corners of the awning and are staked in place. Some people find the angled arms (as shown in the picture above) get in their way and prefer the patio mode. Personally, I prefer to leave the arms attached to the RV. They are very stable and secure and it is quicker and easier to roll the awning up if the wind kicks up or I have to make a quick departure for any reason. If you have any center rafters or "awnbrella" supports they should be installed now. "Awnbrella" supports are designed to bow upward to lift the awning fabric, provide a little extra head room, and improve rain run-off. By tightening and support the fabric they also help control flapping.
To retract your awning and store it for travel, reverse steps used to extend it. If the awning is in patio mode (with the bottom end of the arms removed from their locks on the RV and placed on the ground, reattach them to the RV. Then release the arms and lower the awning roller by unlocking the arms and collapsing them. Most awnings have a release handle that is also used to lift or lower the arms. Then release the catches on the rafters, unscrew the knobs, and slide the outside end of the rafters down toward the bottom of the arms so they're roughly parallel to the side of the RV and in place with the arms. Then release the lock lever on the roller tube. Keep a hand on the tube so it doesn't get away from you as you make your way to the center. Use the awning strap to control the speed at which the awning rolls up. You will need the wand to control the ascent as it rises above your reach. If there is a wind, it may cause the awning to roll up crooked and you may have to tweak the arms a little to get them to close around the rafters -- or unlock the roller, pull the awning back out, and do it over until you get it straight, having someone help by guiding the arms as they close. Once the awning is completed rolled up and in place, tighten the knobs on the rafters and secure the awning arms using the hinged locks or spring pin clamps. There are also after market devices to further secure the awning roller and arms to prevent it from coming loose during transit. Some secure the arms, some secure the rolled fabric. Those that secure the arms are easier to use since you don't have to reach up to the roof or get on the roof to reach the rolled awning to install them. Devices and cases that secure the rolled awning can be difficult to install, but may be worth the effort to protect your expensive awning and give you peace of mind on the road.
A convenient awning accessory is set of awning deflappers. These clever devices fasten to the horiztonal awning arms on each end of the awning and clamp to the fabric to help keep it taught and reduce flapping in light breezes. You still want to retract your awning when the wind picks up. I have tried two different styles. On clamps securely to the awning arms and the other uses a velcro strap. They both work pretty well. The velcro strap version allows you some leverage to pull the awning taught once the clamp is tightened on the fabric. With the rigid model you have to grab hold of the awning fabric and pull it into the clamp while you secure it. This task is easier with two people so if you're planning on setting up your awning by yourself frequently, the one with the velcro strap might be a better choice.
Awnings enhance and extend outdoor living space on our RVs just like patios and porches do on our permanent residences. They provide a place where we can sit and enjoy the view, comfortably out of the sun or even light rain. There are many accessories that can further enhance the experience. On very hot days in the desert I have used a mist system along the awning roller to make the area under the awning cooler and more comfortable. If you connect the mist system to your RV fresh water supply, take care not to use up all your water! I used a separate water supply and pump. There are shades you can use to extend the awning to block late-afternoon sunlight. There are panels you can attach to enclose the awning to create an outdoor room. You can chose from screen panels that partially block the sun and keep out insects but allow you to still see out or solid, privacy panels, that turn the entire area under the awning into an enclosed room. The roller tube on most RV awnings has a slot that accommodates shades and privacy panels and a variety of other accessories, including patio lights and 12-volt fans.
Awning Mats. Awning mats further define your RV "patio" and help keep dirt and debris from being tracked into your coach. There are many beautiful awning mats to choose from to match or compliment just about any RV color scheme. They are usually made of a polypropolene mesh that allows water to pass through the mat instead of puddling. Many people still use simple "grass mats" -- the green, artificial grass style indoor-outdoor carpet available in most hardware stores and home centers. Although the green color doesn't always match the RV color scheme, the lawn-like appearance makes it quite acceptable for most applications. You can also purchase it in any length you want to cover the whole area under your awning. I have used them for years with good success. They are inexpensive and you can hang them on the fence or lay them out on an inclined driveway to hose them off when needed. Be sure to let them dry thoroughly before folding or rolling them up and putting them away. If you put them away wet you'll encourage mold and mildew that won't be pleasant the next time you want to use them. Awning mats can usually benefit from being staked down so the wind doesn't mess with them. When camping on dirt or gravel you can use tent stakes or large (10"-12") nails. I've seen folks recommend driving the nails through a canning jar lid to get some leverage to remove them and to hold the mat securely. I prefer to us large flat washers, which are much stronger than the tin lids. We used to camp on an old paved culdesac the California City area in southern California. It looked just like the rest of the desert but there was asphalt under the sand. Tent pegs and manually driven nails wouldn't work there so I used a Hilti 22 caliber nail gun to tack down my awning mat. 2" nails were usually sufficient and fairly easy to remove when it came time to break camp. I shot the nails through washers so they didn't cut through the mat and could be easily removed.
Another convenient accessory for awnings are side walls. You can choose between screen or solid fabric, depending on whether you want to just keep out the bugs or create a private space. You might adapt ordinary tarps to create a private room, but commercial kits will be cut to size and shape for easier installation, better fit, and will be better looking. Another side wall alternative is a loose knit shade fabric that is primarily intended to filter sunlight without completely blocking your view.
Sometimes you need an extension on your awning when the sun drops low enough to shine underneath it. Extensions are usually made of opaque vinyl sheeting that slides into the accessory rail on the awning roller but can also be attached with clamps to the valance on non-roller awnings. Some full length commercial extenders are made of a mesh fabric that blocks most of the glare but not the view. In a pinch you might use an ordinary tarp to extend your awning. The mesh extenders often serve pretty well to keep the bugs out too. You may need an extension on the front of your awning or on one or both sides, depending on how your rig is oriented toward the sun and what time of day it is. Sometimes you can just let the extenders hang down but mostly you'll want to secure the bottom edge with bungee cords to keep it from flapping and to hold it at the angle you want it. Mesh extenders allow some air flow and block most of the sun' heat while solid extenders will block air flow while completely protecting you from the sun. Choose what will meet your individual needs.
The most convenient awnings are permanently attached to the RV, together with the arms necessary to support them. You can even purchase electrically operated awnings that can be extended or retracted at the touch of a button. Upscale models even have wind and rain sensors that retract the awning automatically when the wind exceeds a pre-set speed or it starts to rain. When using any permanently attached awning, be sure to release the travel locks before trying to extend it and make sure they are securely latched before driving. Many awnings have spring lock pins that push through the arms for a positive lock while traveling that have to be removed to extend the awning. It is a good idea to keep a little tension on the awning as you roll it up to ensure it rolls tightly when putting it away. A loosely rolled awning can be caught by the wind as you're driving and the results can be disasterous!. Not only is it likely to tear the awning fabric, it can whip the awning arms loose, ruining the arms and causing serious damage to your vehicle or even other vehicles on the road.
Permanently installed awnings can usually be used with the bottom of the arms still attached to the vehicle at an angle or in "patio" mode, where the bottom of the arms are staked down to the ground, allowing the arms to stand erect. Leaving the arms attached to the vehicle means you don't have to bother with staking them down to the ground and it makes it quicker and easier to extend and retract the awning. You also avoid having to deal with securing the foot of the arms to muddy ground. This is especially appealing if the wind kicks up and you need to retract the awning in a hurry. A disadvantage to this option is that the arms are angled from the roller at the outer edge of the awning back to where they mount near the bottom of the RV side wall. This creates an obstacle that some people find very annoying. If you're one of them, you can detach the bottom of the arms from the side of the RV and stake them down directly below the roller tube so they are vertical. There are also awning straps that can are designed to help secure the awning in higher winds. They pass over the top of the awning and are secured to the ground by cork-screw shaped metal anchors. In my personal opinion, if the wind gets strong enough to need an awning strap, its time to put the awning away. There are also "deflappers", devices that attach to the rafters and clamp to the fabric to reduce the how much the fabric flaps in moderate breezes. I've tried several styles of these and they all seem to work pretty well. Some are rigid and clamp tightly to the rafters, some use velcro straps around the rafters. They all clamp to the fabric to help keep it tight and reduce flapping. You many want to check out the devices used by your fellow campers to decide which is best for you. The rigid style takes up more storage space, but seems to me to be a little more secure. Permanently installed RV awnings are usually covered by the comprehensive option on your vehicle policy. Since large awnings can be expensive to replace if they get damaged, it is worth looking into what it costs to include comprehensive coverage and what it covers. You don't have to pull a dumb stunt like Robin Williams did in the movie "RV" where he drove off with the awning extended. Close tolerances at camp sites or where you park your RV at home may result in them getting knocked off. If they aren't securely locked -- or if the locking mechanism is worn or sticky -- they may unroll during highway travel and get damaged. If your awning should unroll on the highway, pull over where it is safe and attempt to roll it backup as tightly as possible and secure it so it won't come loose again. Tying or taping the arms along with taping the awning roll itself are some ways to secure it.
Awning maintenance. Awnings normally required little maintenance other than keeping them clean. However, it is a good idea to check all the hardware at least once a year. Spring cleaning is a good to schedule this. Make sure all the screws are tight. That includes those attaching the rail behind the awning as well as all the main brackets. If you are seeing leaks or streaks down the side of your RV under the awning, the screws attaching the rail may be loose and/or the sealant is damaged. For smooth operation spray a little silicone lubricant on the locking mechanisms. Rub a little candle wax or paraffin on sliding surfaces. You might also dry using dry teflon lubricant. Anything that leaves a sticky residue should be avoided since it would trap dirt and damage the surfaces. Be sure to follow your manufacturer's recommendations for lubricants and service and adjustments. Awning fabric can benefit from using special cleaners that condition the fabric and provide extra UV protection. If your awning gets faded but the integrity of the fabric is still in tact you can paint them with vinyl paint to renew -- or change -- the appearance. You will probably have to mask off the portions you don't want to paint. The easiest way I've found is to disconnect the arms so I can let the awning hang all the way down the side of the RV, giving me access to a nice, flat, vertical surface to paint. Go easy and use several light coats to avoid creating runs.
A key factor to keeping an awning looking and good and lasting a long time is to keep it clean and never allow it to be stored wet for any length of time. There are special awning cleaners and conditioners that can safely be used to clean your awning and restore its appearance. A good conditioner will also add UV protection and help prevent the fabric from becoming faded and brittle. If you put an awning away wet and leave it for more than a day or two before opening it up and drying it, the next time you go to use it, it is likely to have the appearance and aroma of a duck blind in the swamp -- not usually a good thing!
A note of caution: awning rollers are spring loaded. Always have a secure grip on the pull strap or awning arms when extending or retracting the awning. If you allow the awning to retract too quickly it can damage the arms, tear the fabric, or pinch your fingers as the arms close! If your awning doesn't roll up tightly enough you may need to adjust the tension. This can be tricky and, if you're not careful, can result in broken fingers if you fail to control the tool you are using to wind the awning. I like to use a pair of Channelock style slip joint pliers to grip the end of the roller once the arms have been removed. You only need to remove them on one end. Leave the other arm in place to secure the other end of the awning. Take is slow and easy, and don't wind it too tight or you'll have trouble extending the awning and may run the risk of breaking the spring!
Bag awnings. A less expensive alternative to permanently mounted awnings are bag awnings. These roll up like a tent and have to be slid into the awning rail on the top of the RV when you want to use them. You will not normally see these on motorhomes or large trailers, but they are frequently used on tent trailers, truck campers, and pop-up trailers where they can be installed while the roof line is within reach. They attach to an awning rail along the top of the RV. To install them on anything but a pop up trailer, you'll probably need a ladder to reach the awning rail. The outer edge is held up by tent poles and they need to be held in place by ropes and stakes to pull the fabric taut. The ropes and stakes sometimes present a tripping hazard as you approach the RV so it is good to tie brightly colored ribbons or pennants to the ropes so you and your guests and see them. I've seen enterprising RVers rig a way to attach the poles to the bottom of the RV wall and hold the awning in place using ratchet straps to avoid the ropes and stakes, but in this configuration you again have an angle obstacle at each end of your awning that is annoying to some people so it is a trade-off.

Lights. If you are attached to shore power, running the generator, or have a sufficient battery/inverter configuration you can run 120-volt electric patio light strings along your awning. You will find a wide selection of styles available just about anyplace RV supplies are sold or you can even use lights designed for home patios. One of my favorites looks like a string of miniature Coleman lanterns. You can buy awning hangers that slide into the accessory slot in the roller. Some have hooks, some have clamps like suspenders. Either one can be used to secure light strings or shades. Some folks use ID badge clips from Walmart to atach stuff to their awning valance. Always make sure the lights hang far enough away from any fabric to avoid scorching it. If you are using a Coleman-style gas lantern, be especially careful to hang it low and away from any side panels and away from the side of your RV. These little beasties generate a LOT of heat. A friend of mine used to comfortably heat his Class B motorhome using only his Coleman lantern. It often got hot enough inside to have to open windows to moderate the temperature, even when it was quite cool outside. These days you can buy various LED lights that will run on your 12 volt system without putting too much drain on the batteries. A really fun version is a 7-color LED rope light that includes a remote control so you can select different colors, speeds, and patterns of operation from the comfort of your camp chair, but they are still kind of pricey.
Cooking under the awning. I try to avoid cooking under the awning. Rising smoke and cooking vapors collect on the underside of the awning and can be difficult to remove. They also leave residual odors and stains that are hard to get rid of and tend to get worse over time. If your stove gets too hot or your fire too high it may melt or scorch the awning fabric. If the weather is bad and you really need -- or want -- to cook under your awning, position the stove near one end (preferably the downwind end) to minimize the area that may be affected by rising smoke and vapors so any breeze will carry the smoke away instead of under your awning. Keep the flame as low as you can for what you're doing, don't light the stove until you are ready to use it, then turn it off as soon as you're done. I do not recommend ever building a campfire under your awning. Gas powered stoves are cleaner than charcoal burning BBQs and Hibachis and don't require the long lead time and it is easier to control the heat. Rising smoke and cooking odors can still damage awning fabrics, so always exercise caution. That being said, I have seen tarps stretched over an entire campsite just leaving a hole in the middle over the fire pit. If done right it works and is generally pretty save, as long as the tarps are high enough above the fire. Consider the traditional teepees of the American Indians. They routinely used fire inside to heat them in cold weather. The steep sides and tall peak with an opening at they very top served as a good chimney to carry the smoke up and away.
If you must put your awning away wet, which you probably will when it rains, open it up, clean it, and let it dry out at the first opportunity and be sure to dry it out before you return your unit to storage. Even in colder times of the year, sunlight on the rolled awning can raise temperatures inside to produce an environment that is very good for molds and fungus. If you put your awning away wet and leave it, the next time you use it, it may look more like a Ducks Unlimited camo paint job than the colorful striped awning you purchased to match your RV! And I'm sure you will find the odor quite, uh, shall we say, unusual and usually quite unpleasant. Of course, if you like earthy tones and odors and don't mind significantly reducing the usable life of your awning, be my guest! Put it away wet and enjoy the science experiment that develops inside of it! Just don't expect your spouse or your neighbors in the campground to share your appreciation for the unusual look and smell of your awning.
E-Z Ups and Dining flys. In addition to bag awnings, there are standalone awnings that can be used adjacent to your RV or over your picnic table. Dining flys are inexpensive and light weight but they are not very sturdy. They typically have thin aluminum poles -- one at each corner and a taller one in the middle. They have to be secured with ropes and stakes, usually two at each corner. Typical sizes are 12'x12', 8'x 16', and 16'x 16'. Their low price (often under $20) and light weight make them an attractive alternative to more expensive RV awings. Bag awnings typically run a couple hundred bucks for a good one. Permanently attached awnings can cost $500 - $1200 depending on size and features -- more if they are electrically operated. E-Z ups are stand alone awnings in which the fabric is usually permanently attached to the frames and they fold up like a scissor lift. They are typically much sturdier than dining flys but are also much bulkier and heavier to transport. They are, as the name implies, easy to set up and do not require ropes and stakes unless they are being used in windy conditions. They come in a variety of colors and fabrics, including mesh and solid materials depending on whether you want partial shade or full shade or rain protection. You may want to use an awning mat under stand alone awnings just as you would under a permanently mounted awning. The mat helps define the living space and creates a more sanitary and attractive "floor" than dirt, gravel, pavement, or grass.

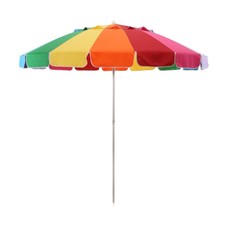
Umbrellas. Beach umbrellas can be useful when camping. They come in a variety of sizes, ranging from personal models about 3' in diameter to patio or beach models that are typically 6-13 feet across. Large patio umbrellas can shade a whole picnic table and will required a sturdy base to hold them up. Smaller ones that clamp to your camp chairs provide personal shade. Ordinary rain umbrellas may be handy for both sun and rain. For extra coverage, choose a golf umbrella. A big, floppy, wide-brimmed hat can serve as your personal awning or umbrella and leaves your hands free for activities.
Sometimes a "shady deal" is just what you need!
Nice blog dear I like the way as you present your view among the all visitors. I would like to join you again on this blog it’s a very nice visit on this blog. It’s very attractive and effective for visitors. Awning Manufacturers in Hyderabad, Awning Manufacturers in Mumbai
ReplyDeletePlease share more!..Nice one
ReplyDeleteSlotted Screws manufacturers in mumbai
Thanks for all of these posts. I like the guidelines you've laid out here. Thanks for sharing us.
ReplyDeleteAwning Signs Sydney | Snap Clip Frames
Your manner of writing about Awnings Roma Qld is really appreciable and admirable.I would like to thanks to share such a great info us and want to continue with your blogs.
ReplyDelete... camperawninglights.blogspot.com
ReplyDeleteVery nice article, I enjoyed reading your post, very nice share, I want to twit this to my followers. Thanks!.
ReplyDeleteסוככים
Al’s Trailers is an Oregon RV dealer and major provider of RV parts, Supplies and Accessories. We specialize in New and Used RV Sales, RV Service, RV Parts and Accessories
ReplyDeletehttps://www.alstrailers.com/
This comment has been removed by the author.
ReplyDeleteReally i like the way of your blog post content, it's a good information..
ReplyDeletemultifamily signage in texas
apartment & multifamily signage