Gray water is the water from the sinks and showers in an RV or the water from dishpans and wash basins when tent camping. Gray water is usually just soapy water, but dishwater can often be quite greasy and contain quite a bit of food residue. The question of dumping gray water on the ground comes up frequently. Tent campers often just toss their dishwater or wash water out in the bushes or dump it on the grass. This really isn't a good idea since soap and other contaminates can damage the environment and sometimes spread disease. Never use this method if it is prohibited in the campground. When you are allowed to use this method, such as when boondocking in a remote location, don't dump it all in one place. Spread it out so it can filter through the soil before entering any aquafiers in the ground. I've seen people camping in RVs in the desert run a garden hose 25-50 feet from their RV and let the gray water drain out onto the ground or into a gopher hole or snake hole. Neither of these is a good idea and is often illegal. Allowing it to flow out onto the ground will usually result it soapy residue after the water evaporates and soaks into the ground. Running into a hole may flood some animal's home. That might force dangerous animals like poisonous snakes out into your camp site! All that being said, the technique is useful for extending your stay in a remote location -- IF you can do it discreetly and legally. If you feel you MUST drain gray water out into the desert, be sure to run the hose away from the camp so it doesn't flow back toward any occupied areas or create any muddy "traps" where campers might walk or vehicles might sink in -- and always make sure it isn't prohibited by local regulations to prevent damage to the environment and avoid costly fines.
The general rule, is only dump holding tanks (both gray and black) into approved dump stations. In many jurisdictions it is illegal to dump ANY holding tank waste onto the ground. Even in remote locations, like the desert camping described above, it is unwise to dump gray water onto or into the ground. At the least you will likely be leaving residue that will create an unpleasant or offensive smell near your camp site. Another camper may end up parking or setting up a tent on top of your discharge. Next time you visit the area it might even be you! Some campgrounds have special places called sumps for tent campers to dump their waste water. They are often partially submerged perforated 55 gallon drums beneath a gravel covered dumping basin with sand and gravel in the bottom so the waste is contained and filtered before entering the eco-system. These are adequate for small amounts of water like a dishpan or wash basin full of soapy water but should NOT be used to empty RV gray water holding tanks, which would overwhelm the capacity of the sump and probably overflow onto the surrounding ground.
The best way to limit how quickly your holding tanks fill up is to limit your water usage, which also helps your fresh water last longer. Be stingy in your water usage. Don't let it run to rinse dishes. Wipe them off with a paper towel or wad of old newspaper. When you take a shower, catch the water you run while adjusting the temperature into a dishpan and use that for rinsing dishes and other routine cleanups around camp. When washing your hands and face, brushing your teeth, or showering, turn off the water when you aren't actually using it to wet or rinse your body. If your RV shower doesn't have a shut off at the shower head one can usually be added fairly easily and inexpensively. Sometimes you can drain off little grey water into a bucket and use it to drown the campfire to reduce filling the holding tank. The heat of the campfire plus the filtering effect of the ashes helps purify the water before it enters the ground. Don't run a hose from your dump valve and drain your whole tank onto the fire. It will probably quickly overrun the fire pit and contaminate your campsite. If do run a hose to drown the campfire, make sure you have a shutoff valve or have someone monitoring the dump valve to shut if off as soon as the fire is out so you don't flood the area around the campfire with potentially smelly water.
Gray water tanks may develop foul odors if not properly maintained but usually proper flushing is all that is needed to keep them fresh and clean. Chemicals can be added to further reduce odors if necessary. There are chemical treatments especially designed for gray water tanks but, in an emergency, you could use a reduced amount of the same chemicals you use in your black water tank. Since you have no access to use a wand to flush gray water tanks, you either have to run sufficient water down the drains to refill and rinse the thanks, use a back-flush system on your dump hose, or use an "EZ-Flush". The EZ-Flush is by far the easiest to use and the most effective. It consists of a permanently installed nozzle on one of the walls of the holding tank that is connected to an external female hose fitting like your city water connection on the side of your RV. You simple hook up a garden hose, turn on the faucet, and flush the tank until the water from the dump hose runs clear. Water from the gray water tank will usually be, well, gray or cloudy until it has been thoroughly flushed. Being careful what you put into your gray water tanks is another way to avoid odors. Avoid odor-causing deposits by NOT rinsing excess food from dirty dishes down your sink drain. Use paper towels or old newspaper to wipe the garbage off instead of rinsing them in the sink. Most soapy water, like from doing dishes, bathing, or washing your hands and brushing your teeth won't be a problem. In fact, the soapy water will actually help clean the holding tank and the dump hose after dumping the black water tank. Be cautious changing diapers and cleaning baby bottoms. You don't want fecal matter in your gray water tank! It is surprising how little it takes to foster a bad smell. Odors are more likely to develop in warm weather than cool so you might be more likely to need gray water odor treatments during hot summer camping trips.
You might get odors from your holding tanks while driving. This is usually caused by a partial vacuum inside the coach generated by an open window. It may also be caused by a clogged vent (birds and other pests sometimes build nests inside the vent caps on the roof). If the odors are strongest inside a kitchen cabinet the problem may be a faulty vacuum breaker. This is a device in the gray water plumbing that prevents the water seal in the P-traps being siphoned out when the tanks are dumped. Sometimes tapping the device lightly will release a stuck valve, but don't hit it too hard. It is made of plastic and if you break it you'll have far worse problems than bad odors. Speaking of P-traps, every sink and shower should have one. Its purpose is to trap water in order to prevent fumes and odors from the holding tank from coming back up and out of the drains into the living space. If your RV hasn't been used in a while, the P-traps may have dried up. Sometimes the water in the trap is sloshed out when driving on rough or twisty roads. If you detect odors coming up from a drain, dump a cup of water down the drain to refill the P-trap.
Annual gray water tank cleaning. Spring cleaning, when you de-winterize your RV and get it ready for a new season, is an excellent time to give your gray water tank a thorough cleaning. Here is one way to easily do it. Dissolve 2 cups of powdered water softener in 1 gallon of hot water and pour it down a drain in your RV. Powdered water softener is found in the laundry section of the grocery store. Pour 2 tablespoons liquid dish washing soap down the drain. Run the water in your camper until the gray water tank is three-quarters full. Drive the RV around for a few minutes to agitate the solution in the tank, then drain and flush it completely. Thoroughly clean the gray tank in this manner at the beginning of each season and thorough flushing at each regular dumping should be sufficient to keep your gray water tank from going sour on you. Often the water that enters the tank while flushing and sanitizing the fresh water system will be sufficient to clean and sanitize the gray water holding tank, but if you still suspect odors after draining off the bleach solution used to sanitize the fresh water system, clean the gray water tank as described above.
Proper dumping and cleaning of holding tanks can help keep the sensors clean so you get accurate readings on you gauges on the monitor panel inside.
Daily odor control. If you start to notice odors from your gray water tank, add a cup of vinegar through one of the drains for each 10 gallons of water in the tank. Note, this is not for each 10 gallons of capacity, but each 10 gallons in the tank. For example, if you have a 60 gallon tank and it is half full in will contain 30 gallons of waste water: add 3 cups of vinegar. Vinegar is a safe and natural disinfectant that kills germs and reduces odors. You will need to run a little water in each drain to flush the vinegar past the P-traps.
Gray water is mostly water and is susceptible to freezing when temperatures drop below 32° F. It may resist freezing until a few degrees cooler, depending on the type and concentration of detergents and other stuff in the water. If you are camping or just storing your RV in sub-freezing temperatures, you must takes steps to prevent the gray water system from freezing. Exposed pipes can be wrapped with heat tape (assuming you have 120 volt power available). Drain pipes and dump valves can be protected with antifreeze. About a gallon of antifreeze added to an empty tank should fill and protect the dump valves. You may need a lot more to keep the contents from freezing if you're camping in sub-freezing weather. See your local RV shop to determine how much antifreeze you need for the size of your tanks. Dump at least 1-2 cups of antifreeze down every drain to protect the P-traps if when the interior isn't heated. Without protection your gray water tank and plumbing could freeze solid and split. When things warm up, the contents will leak out making a heck of a mess! Always use the special, pink-colored, Marine/RV antifreeze. Regular green, orange, or blue car engine antifreeze is toxic.
Read more: How to Remove Gray Water Tanks on an RV for details on how to replace a gray water tank that is no longer serviceable. Any significant physical damage would make a tank unservicable. A tank that has accumulated too much residue inside may be so difficult to clean that it can no longer be used. Doing proper cleaning on a regular basis can prevent this from happening.
Keep it clean!

Information on recreational vehicles (RVs) and Off Highway Vehicles (OHVs), Camping, Sailing, and Survival
Tuesday, October 30, 2012
Using a "Water Thief"
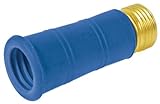
To use a "water thief", push the rubber end of the device as far onto the unthreaded faucet as you can. They are designed to be fit tightly and normally don't require any kind of clamp. Then simply screw your garden hose to the threaded end. I've seen people use hose clamps to keep a water thief secure but it kind of defeats the convenience of the water thief and the purpose of the unthreaded faucet when you clamp it on and make it semi-permanent. Using a clamp may also damage the rubber and quickly make it unusable.
DO NOT attempt to use a "water thief" to connect your city water connection to your RV. The rubber adapter is intended for a temporary hose connection and not designed to withstand the pressure if the other end of the hose is shut off, as it would be when connected to an RV. It may hold for a short while but will soon blow off. Besides that, it isn't polite or ethical to hog the faucet. One of the reasons they use unthreaded faucets is to discourage semi-permanent connections since the faucets are shared by several users.
If you use a "water thief" to fill your RV fresh water tank, be considerate of other campers who may be waiting to use the faucet. The number and location of faucets in the campground is intended to give reasonable access to water based on the number of campsites each faucet is expected to serve and short uses for each site. If you tie it up for a long time filling a 100 gallon RV tank you may be depriving other campers much needed and deserved access. If you need to fill a large RV fresh water tank, do it when other usage is low. Avoid tying up the faucet around mealtimes. Using a water thief to attach a hose to make filling your water jugs easier could actually help you reduce how long you are using the faucet since you can move the hose from jug to jug faster than you can switch jugs if you're filling them directly from the faucet.
"Water thief" adapters are usually available at most RV stores for around $5.00. They take up little room in your camping supplies and can add convenience to your camping experience.
Fill 'er up!
City Water Hookups
Using city water hookups is pretty easy and adds a lot of convenience when camping in a campground with hookups. Just connect your potable water hose between the faucet and the connection on the side of your RV. Do not use an ordinary garden hose. Potable water hoses are made with compounds that won't leach chemicals or taste into the water. They are also usually reinforced to stand up to constant pressure between the faucet and the RV's water system. To protect both your hose and your RV's plumbing, use a pressure regulator between the faucet and the hose. The connection on the RV will be an external female hose connector on the outside (usually on the left side) of your RV and should be clearly labeled. It may be recessed or flush mounted so it sticks out. It should have a plastic cover over it when not in use. Some RVs have similar connections for flushing the holding tanks and those should also be clearly labeled. If they are not labeled, look underneath to try to see where the lines go. The city water connection will usually be about midway up the side of the wall. The flush connections are usually lower, near the bottom of the wall near the holding tanks, and you can probably see where the hoses run underneath to the holding tanks. Connecting your fresh water hose to the sewer flush connectors could contaminate your hose and thus your water supply. One-way valves in the flushing system normally prevent any sewage from leaking from the connectors but having used the your sewer rinse hose on them previously after the hose was used to clean the large sewer dump hose or handling by less than clean hands may have contaminated the connection. Though the pollution level may be very low, I for one, don't relish the thought of adding any sewer residue to my fresh water!
The city water connection on your RV should contain a check valve and possibly a restrictor to reduce pressure to protect your plumbing. Without the check valve water will spurt out the city water connection when you turn on your water pump. Check valves can get stuck and I've even seen them removed from some RVs. Screwing a male hose plug into the female connector is an easy, inexpensive, and fairly easy way to temporarily solve the problem until you can replace the connector. Why would anyone remove the check valve you ask. They may have been trying to get better flow or pressure from a city water source into their RV and, if they never used the onboard water tank and pump it wouldn't matter. But I would think they would need to use the pump once in a while at least, like when stopping at a freeway rest area.
Another potential and fairly common problem with city water hookups is water pressure. You never know what the pressure will be unless you test it. Low pressure is inconvenient, high pressure can damage your RV plumbing. To be safe, always use an in-line pressure regulator right at the faucet so it protects both the hose and the RV water system from excess pressure. Regulators are fairly inexpensive (under $10) and can avoid costly repairs. For better control and allegedly better flow, adapt an adjustable residential pressure regulator. Make sure your water line lies flat on the ground so it doesn't become a trip hazard. I also like to use an 90° elbow right at the RV connection so the hose hangs straight down instead of getting kinked where it connects to the RV. These special elbows have a male hose connector on one end to connect to the RV and a female connection on the other end to accept the male end of your potable water hose. If you know or suspect the water may have a high mineral content or other particulates, use an in-line filter to clean the water before it gets into your RV system. In-line filters are usually around $20 each and last a few months. Place the filter near the faucet so its weight doesn't stress the connection on the side of your RV. Your RV might have a built-in filter for the whole water system. If so, all you need to do is make sure the cartridge is changed periodically. The cartridges usually last longer than in-line filters before they have to be changed. If your RV doesn't have an on-board filter, you may be able to purchase one at a home center and install it yourself or have one installed by a qualified RV technician. Having a permanent filter adds convenience and usually reduces cost. I'm told that adapting a residential filter is usually less expensive than installing one marketed specifically for RVs but just as effective.
Before you connect your hose to the RV, run a little water through it to rinse out any or dust or bugs that might have gotten into it during storage and to get rid of any stale water that may have been left over from the last time you used it. Be careful where the water goes so you don't muddy pathways or flood someone's site (including yours!). To keep stuff out while in storage, use hose end caps or simply screw the two ends of the hose together. Be sure you dump all the water out first. Otherwise, the trapped water could develop biological contamination (algae, mold, mildew) from naturally occurring micro-organisms in many water sources. Flushing the hose after you've hooked it up to the faucet but before you connect it to your RV or start filling your RV or jugs ensures most contaminants are washed away. If, when you flush your hose, the output is unacceptably dirty or foul smelling, you may want to purify the hose with vinegar or a 10% bleach solution then thoroughly rinse it before using it.
It is not a good idea to connect to faucets at dump stations to fill your fresh water tanks, let alone use it for a city water connection. The chances of the connections having become contaminated is too great. It is unlikely that any sewage has been flushed back into the water system, but the connections themselves often are dirtied by unclean rinse hoses or even dirty hands/gloves. When in a campground, always connect only to the faucet assigned to your designated camping space or get permission from the designated user to share it. NEVER tie up a nearby public faucet for your personal use or use the faucet from someone else's camp site without permission.
Monitor your water system so you can detect any leaks before they cause serious damage to your RV. Listen for water flowing or hissing when all the fixtures are shut off. Watch for damp spots where there shouldn't be any. If you think you have a leak, turn off the water at the faucet and only use it as needed instead of leaving it connected all the time.
Always use a pressure regulator attached to the faucet to protect both your hose and your RV plumbing. Another handy accessory is an elbow so the hose hangs straight down from the side of your RV instead of kinking where is screws into the fitting.
Sunlight can heat the water in your city water hose quite a bit during summer months. One enterprising RVer solved this problem by buying an inexpensive soft-sided cooler at Walmart and coiling the extra hose in it and putting it under his RV out of direct sunlight and minimizing the amount of hose left in the sun. When it came time to pack up he just rolled the rest of the hose together with the pressure regulator inside the cooler and zipped it up. In camp it keeps the hose cooler. On the road it keeps the hose clean and contained and captures any residual water that drips out of the hose so it doesn't wet other items in the storage compartment. I either use end caps on my fresh water hose or hook the two ends together to prevent left over water from draining into my storage compartment and to keep bugs and debris from getting into the hose. Leave one end of the hose at ground level while coiling up the hose to drain out as much water as feasible before storing the hose. I like to pull the hose over my shoulder when rolling it up to get out as much water as possible.
City water hookups need special attention during freezing weather. If you do any camping in freezing weather, you will have to protect your hose and the faucet using heat tape or they will freeze and split. A frozen hose in inconvenient and you'll spend a least $25 replacing it. If you leave your hose connected to a campground faucet without protecting it with heat tape, the pipes may freeze and you'll probably be liable for the cost of repairs. Digging up a frost-free faucet and replacing it is not a trivial nor inexpensive task. The frost-free faucets used in cold weather campgrounds are designed so that the water drains out below the freezing level when the faucet is shut off and the hose disconnected. Leaving the faucet on or leaving the hose connected leaves water in the pipe. Don't be surprised if you get assessed $100 or more for repairs if you leave your hose connected and cause the campground's pipes to freeze. Those frost-free faucets are not cheap and it takes a lot of work to dig them up and replace them, especially when the ground is frozen! You can wrap your existing potable water hose with heat tape or purchase a heated hose. The heated hose will be more convenient to use but they are fairly expensive -- and you'll still need heat tape for the faucet if you leave your hose connected in freezing weather. Leaving the hose connected defeats the frost-free design by trapping water in the exposed parts of the faucet and plumbing.
Drink up!
Kitchen Utensils for Camping
You probably haven't given much thought to choosing kitchen utensils for camping. And that's OK. Most people have enough experience in the kitchen to know that they're going to need and just duplicate that, or as much as they think they'll need for camping. However, there are some choices for camping that work better than what you normally use at home and having dedicated utensils for camping will make loading and unloading for each trip easier. What you take with you may depend partially on whether you're in an RV or are tent camping. If you're in an RV, you probably want to maintain a pretty well stocked kitchen, similar to what you have at home. However, you may have space limitations. If you're tent camping, you may need to limit the amount of stuff you have to carry around. Even in an RV your drawer space will probably be a lot smaller than at home so you may want to downsize some items and seek multi-use tools to reduce how many things you have to sort through when you need something. You probably won't need everything you have at home. Your menus will, to some extent, dictate what utensils you will need. If you stick to a simple menu, you should be good to go with basic utensils. Another factor is the potential to be cooking on a campfire. For campfire cooking you will not only need fire resistant utensils, but you will probably want ones with extra long handles for safety and comfort. Plastic utensils that work just fine at home and may even be preferred for non-stick pans may not be the best choice for campfire cooking.
The biggest difference will be the need for durability and resistance to fire. The plastic utensils we favor to protect our Teflon cookware at home may not hold up to the rigors of camp cooking, especially if you're cooking on the campfire. Camping also brings frequent distractions and plastic utensils left in the pan may quickly begin to melt. I prefer solid stainless steel utensils, but steel items with wooden or heat-resistant plastic or wood handles usually work well, are sometimes less expensive, and last a long time if you keep the handles away from flames. Stainless steel items can get hot so you might need gloves or hotpads. Old-fashioned porcelain covered "speckleware" has a nice pioneer ambiance and works well for camping. I have a meat fork, serving spoon, and ladle in "speckleware" or "graniteware". I also have a set of speckleware soup spoons that are fun to use. For really heavy duty stainless steel utensils, check out a restaurant supply store. However, you probably don't need to invest that much. I've used the ones I bought at my local "dollar" store for decades without any problems. The only issue I've had, is my wife liked my ladle so well she commandeered it for the home kitchen and I had to find another one.
Which utensils you need will ultimately depend on your menus and cooking style, but here are some basics most everyone will find useful:
* cooking/serving spoons (I suggest at least 2)
* slotted spoon
* meat fork
* spatulas (again I suggest having 2)
* ladle
* paring knife
* small and medium butcher knives
* dish towels and/or paper towels
If you are into basting, you'll need a baster and/or a basting brush. I would get a plastic baster rather than a glass one since it is less fragile and less likely to break rattling around on the road. If you like spaghetti or pasta, a claw-style spaghetti spoon is good to have. You'll need some cutlery too. I like to have at least a couple of different sized butcher knives, a bread knife, and a paring knife or two. Having sharp instruments rattling around in the kitchen drawers dulls them and makes retrieving anything from the drawers dangerous so I like to keep them in one of the wood-block knife holders on the counter or in a cupboard and secure it with Velcro or small bungee cords. Another good way to keep them safe and handy is to store them on a magnetic knife rack. Or you can put protect each one in its individual PVC pipe container. Cut a section of PVC pipe a bit longer than the knife from pipe with an inside diameter big enough to accommodate the widest part of the blade and/or handle. Then cap it on both ends with PVC pipe caps, but don't glue them on! Then mark the pipe using a permanent marker so you know exactly what is inside (3" paring knife, 5" butcher knife, etc.). The only problem with this solution is it takes up more room in the drawer.
Make sure you have can and bottle openers. I once arrived in camp many miles from home and didn't realize until I started to fix some canned chili for dinner that I didn't have a can opener on board. Now I make sure I have manual can opener in my motorhome, in my truck camper, and in my tent camping tub. And I carry a supply of Army "P-38" or "P-51"can openers. They are small and sometimes difficult to use, but they are better than trying to open a can with a pocket knife. P-38 and P-51 can openers are especially convenient for hiking and back packing but are a handy addition to any camp kit. They take up almost no room. P-38s are about 1 1/2" x 1/2".The P-51s are larger, giving you a bit more leverage. Either one can be carried on a key ring with your keys but I found the sharp edge sometimes cut my pockets.
Measuring cups have many uses in camp. Most sets stack within themselves so they take up little room but collapsible measure cups are even more compact. They can even be hung on the inside of an RV or chuck box cabinet door for convenient access without taking up much usable space.
An item I've seen promoted as the best kitchen utensil ever for RV use is a pot strainer. This is a flat, crescent shaped strainer with a handle that you can use on just about any pot or pan, eliminating the need for a collander or bulky strainer. Would be really handy if you cook a lot of pasta.
Having dedicated utensils for camping adds convenience and helps reduce the possibility of forgetting something you need. I have a Class A motorhome, a truck camper, and a tent camping setup and I keep all three stocked separately so I'll have what I need when I need it without having to remember to transfer things for each outing. My RV and camper stuff is conveniently stored in the galley cabinets and drawers. Our sailboat has its own sliding galley made from a chuck box that we keep fully stocked. Tent camping utensils reside in a translucent plastic tubs that are easy to transport to the campsite and keeps things clean and sanitary in camp and between trips. I know for sure from experience that if I have to switch things around for each trip, I will forget something!
Don't let these recommendations keep you from camping with what you have on hand. If dedicated utensils for camping aren't in your budget yet or you don't have time to get them before your trip, borrow from your kitchen and hit the road. Just be careful that you don't destroy or lose your home utensils in camp. When you are ready to buy a set of utensils dedicated to camping, check our your local dollar store or thrift store before spending lots of money in department or restaurant supply stores. That way, if something does get lost or destroyed, you're not out a lot of money and can easily replace it. Sometimes it makes sense to upgrade your home cookware and re-purpose the old stuff for camping. Also, before you head to the store, be sure to check out what you have on hand. If you have duplicates you can spare or some old stuff you were saving to give to charity, you may be able to fill your camping needs without spending any money. If painted handles have worn you can easily sand them down and repaint them to give them new life in your camp kit. That way you can even make a matching set out of a bunch of odds and ends. Using a unique color will also help you keep track of your stuff in camp and avoid getting them confused with other people's stuff or with the stuff you use at home.
Camp cooking is fun!
Sunday, October 28, 2012
Remote or Primitive Tent Camping
Tent camping offers opportunities to REALLY get "off the grid". You can start by car camping in remote or primitive campgrounds. If you really want to get away from it all, try back packing, hiking in, or horse camping. Remote camping lets you experience nature in ways you cannot in developed areas. The proximity of other campers in campgrounds often disturbs the peace and tranquility you might be seeking. Light pollution is another problem in many developed campgrounds. Light from offices, camp stores, street and parking lot lighting, nearby communities, and other camp sites can inhibit your view of the stars. It is surprising how far the glow from city lights will extend into the surrounding countryside, especially when the sky is overcast so it reflects off the clouds. Getting out into raw country minimizes these problems. Unless you depend on getting your water from the campground and prefer even smelly pit toilets to digging your own latrines, tent campers have no need to be tied to developed campgrounds.
Primitive car camping is a good way to start remote camping. You may choose remote Forest Service campgrounds or even seek out open camping areas on completely unimproved BLM and Forest Service lands. The biggest difference between really boondocking in a tent and staying in a primitive campground is that most campgrounds have a source of water and at least pit toilets, if not flush toilets or even complete restrooms with showers. When really roughing it in undeveloped, open camping areas, you'll have to bring along all your own water and may have to dig your own latrines. Developed campgrounds usually have fire rings or fire pits for your use at each designated camp site. In an undeveloped area you may have to build your own fire pit. If you are camping in an area where others have camped before, take advantage of any fire pit that may already exist. If you have to build your own, do it right. Clear the ground where you're going to build your fire and at least 5' all around it of any combustible material. Create a ring of rocks or dig a hole and make a berm around it to contain your fire. In some popular primitive camping areas you may find rock fire pits left behind by previous campers. Try to take advantage of these whenever you can. It will save you time and effort and reduce your impact on the environment. If you are creating a new fire pit, make sure it is far enough way from trees and bushes to be safe -- and that there will be room for you and your companions to move safely around the fire. Build it downwind from your tent and vehicles so blowing sparks don't create a fire hazard. Be sure to observe all fire safety practices. Check on fire conditions BEFORE you build any fire in a remote location. Be sure to check on whether there are any fire restrictions in effect. Open fires except in approved fire pits are often prohibited during fire season. When you go completely off grid you'll have to provide for your own sanitation needs. That usually means digging a latrine but some campers prefer to bring along a folding portable toilet. It makes "going" more comfortable but you have to deal with disposing of the waste collected in plastic bags.
You may be able to drive right to a remote campsite in some forest service and BLM areas. That may give you the best combination of getting away from civilization but not having to pack a lot of equipment very far on your own back. Some forest service campgrounds provide fairly good privacy and separation from other camp sites. In places like that you can have the best of both worlds -- a primitive camping experience but still have access to safe potable water and maybe pit or even flush toilets.
In most primitive camping areas you'll have to deal with rocks, twigs, and other debris that could damage your tent floor or interfere with a good night's sleep. With that in mind,it is a good idea to bring a small, collapsible rake so you can clear your spot before you set up your tent. Using a site that has been used before may give you a spot where someone else has already cleared the debris.
For the utlimate natural experience, back packing combines hiking and camping and gives you really good chance to practice your survival skills. For back packing you'll need light weight gear -- tent, sleeping bag and a single-burner back-packing stove. You can forgo the stove if you can do all your cooking on a campfire. Fire restrictions may prohibit open fires, so be sure to check with the local ranger before you hit the trail. You will want to pack some extra clothes in case you get caught in a sudden storm and what you're wearing gets wet. It is also nice to have something to wear while you rinse out the clothes you've been hiking in for days before they take on a life of their own. Dehydrated meals are compact, light weight, and easy to prepare on the trail, but they are somewhat expensive. Military "MREs" (Meals Ready to Eat) are also popular choices but can also be kind of pricey and a little heavy and bulky to carry. If you'll be hiking in an area with lakes or streams you might be able to catch your dinner. Unless you are really good at foraging or fishing you'll need to bring along enough food for your entire trip. Energy bars are sometimes adequate for lunches and can give you a much needed afternoon boost from time to time. When planning a back packing trip, be sure to do your homework. Know your routes. Carefully plan your menus and calculate your water needs. Unless there is proven safe potable water along the trail you'll have to find a way to carry all you need with you or be prepared to purify available water along the way.
Horse camping offers a chance to explore a cowboy experience. Horse camping can give you greater range than back packing and you can usually take more food and equipment along, especially if you have a pack horse. Cowboys got by with what they carried on their saddles, usually a canteen, a bedroll, and what would fit in their saddle bags. A cowboy bedroll is a canvas enclosed sleeping cocoon. The canvas protects you from ground moisture and from rain. Cowboys usually didn't carry tents, but you can always tuck a back packing tent into your bedroll or saddle bags or carry a larger tent on a pack horse. There are detailed instructions on the Internet for making your own cowboy bedroll or you an buy one for around $100. Depending on availability of pasture for your horses along the trail you may need to carry feed for them as well. You will need to provide a way to keep them from wandering off when you camp. Hobbles will restrict how quickly they can move. Some trail systems that cater to horse back riders have corrals along the way or you might make your own from fallen timber or even just rope. A common way of tethering horses is a "high line" -- a rope to which horses are tethered with a long enough lead to allow them to graze. A battery-powered electric fence is also a modern option. For a true cowboy experience, plan on doing all your cooking on the campfire. For more convenience, bring along a back packing stove. If you have an extra horse and a pack saddle, you may be able to bring along a little more equipment and creature comforts than you could carry in your saddle bags.
Camp OUT!
Tent Camping in Campgrounds
Tent camping in campgrounds has several advantages and a few disadvantages. Campgrounds usually provide level, often grassy spaces, free of debris to set up your tent. You will usually have designated parking places that are paved or at least graveled, close to where you will set up your tent so you don't have to carry your stuff too far. Very often there will be community water spigots where you can get water as you need it. There may be toilets, sometimes even full service bathrooms with hot showers but sometimes just primitive pit toilets. But that still beats digging your own latrine! Some campgrounds provide an area with sinks and counter space where you can wash your dishes. Campgrounds will usually provide picnic tables and approved fire pits. What is special about an approved fire pit? Well, it has been constructed according to Forest Service standards and has been inspected and approved for use. Forest areas often come under fire restrictions during hot, dry summer months when fires are only allowed in approved fire pits. The fine for having an open fire in a restricted area can be very heavy and the penalties for allowing your unapproved fire to get away from you and start a brush fire or forest fire can run into the millions of dollars in fire fighting costs and property damage which you could be ordered to pay for!
Access to campgrounds is usually via good roads making them within easy reach by family car. Primitive/remote sites may be require more rugged transportation to be reached. If you are planning to camp "off road" you may need a high-clearance 4 wheel drive vehicle just to get there.
Campgrounds may also give you access to camp stores and local businesses in case you need some supplies and to a ranger or camp host who is knowledgeable about the area and can give excellent advice regarding trails, activities, and even weather. You will also have fellow campers around you who can be a good source of information and assistance. Most campgrounds try to have at least some shade, natural or artificial (canopy) for your comfort.
Disadvantages mostly consist of increased proximity to civilization, including fellow campers, that can intrude on your solitude if you are seeking a truly pristine camping experience. Light from parking lots, streets, and nearby businesses may limit your view of the night sky. You might experience "noise pollution" from nearby highways, railroads, or large event venues. Some frequently used camp sites may suffer from abuse. You may encounter dirty or damaged tables, left behind trash, non-combustibles in the fire pit, and nasty bathrooms.. Of course, if everyone observed proper camping etiquette, you wouldn't run into these problems, but, unfortunately, not everyone is as considerate as they should be. Sites in some campgrounds may be closer together than you might like. And, of course, you must pay a fee to use most developed campgrounds, especially if there are amenities for your convenience.
Unless you are in an open camping area you will be in a designated site. Be careful to keep your stuff within your designated area and not intrude on space allocated to other campers. It is also a good idea in open or primitive camping areas to keep all your belongings close. Not only is it more considerate to other campers, it keeps them more convenient for your use and allows you to maintain better security over your things.
Some commercial campgrounds include many resort style amenities. Some typical examples are badminton, table tennis, shuffle board, swimming pools, bathrooms, showers, camp store, and restaurant.
Some, but not all, campgrounds accommodate both RVs and tent campers. Many Forest Service Campgrounds do not allow RVs. Some RV parks do not allow tent camping. Don't just assume you can set up your tent in an RV space. You may get an unexpected visit from local law enforcement -- or at least the camp host evicting you! If you do occupy an RV space expect to pay the standard RV rate unless told otherwise.
Happy camping!
Friday, October 26, 2012
RV Camping Without Hookups (Boondocking)
Camping without hookups is often called "dry camping", "camping off the grid", or "boondocking". While technically you are "dry camping" if you stop in a rest area or a Walmart parking lot, it is usually used to describe more extensive camping in a remote, primitive camping area. In some cases there may be designated camp sites but no hook ups, as is sometimes the case in primitive Forest Service campgrounds. Very often, boondocking occurs on BLM or other public lands in open or dispersed camping areas where there are no designated camp sites. The same principles of self-contained operation apply any time you aren't where you have full hookups. Boondocking is probably more different from using commercial campgrounds with hook ups for RVers than it is for tent campers. Tent campers usually don't rely too much on camp ground amenities, although they do often benefit from water and sanitation stations and sometimes even electricity. The ability to go boondocking is a major consideration for most people who buy RVs, even though something like 70% of RV owners report that they mostly stay in full hook-up campgrounds. Personally, in more than 30 years of RVing I have seldom stayed in a full hook-up campground. When our kids were growing up we spent almost every holiday weekend boondocking and dirt biking in the Mojave Desert.
Even though surveys show about 3/4s of all RV owners camp in full hookup campgrounds, those same owners chose RVs that are self contained and capable of camping "off grid". My family and most of my camping buddies are in the other 25%, mostly boondocking in remote areas where we can ride our OHVs and being self contained is essential.
One of the first considerations for boondocking is where to go. Some forest service campgrounds accept RVs but have no hook-ups. In Western states there are many open camping areas on BLM land where you can camp virtually anywhere. Be aware that some locations do restrict camping to designated areas so be sure to verify your options BEFORE you go. In primitive forest service campgrounds the spaces will usually be clearly designated and marked. In some USFS domains camping is allowed within 150' of any Forest Service Road, but always check with the local ranger station before blithely driving off the road somewhere. Rangers can usually guide you to the best places even when there are no specific restrictions. That can mean safer and easier access for your RV and to various trails and activities. In open camping areas you can choose where to set up camp. Try first to use areas that have been used before. Doing so usually makes your setup easier and minimizes the impact on the environment. Using an existing site usually means someone else has already taken to time to locate the most level spots for RVs or setting up tents and may have already created a rock fire pit. It usually means there is reasonably good access so you won't get stuck or damage your vehicle. If you have to set up in a pristine location, it is a good idea to walk the site before you drive onto it to avoid unnecessary damage to both your vehicle and the site. Having a wheel drop into a gopher hole or tunnel could damage your rig and/or get you stuck. Rocks hidden in the brush might bend wheels, damage suspension, or poke holes in transmission pans or oil pans Figure out the best place to park, where you want to set up your tent, if you're using one, where you want your picnic table and where to build your campfire. If you can determine the direction of prevailing winds, try to park with your vehicle nosed into the wind. Some beach areas offer off-grid camping. There are several wonderful places along Highway 1 on the California coast that we have enjoyed. Open camping directly on the beach is often prohibited but if access is allowed, exercise caution to avoid getting stuck in the sand or damaging your tires on buried obstacles such as broken bottles.
If you are camping with a group, make sure you pick a spot with sufficient room for everyone. The best way to organize a group camp is the old wagon train format and "circle the wagons", with individual RVs or tents surrounding a central common campfire and group meeting area. It is most convenient if all the doors face the center of the circle where you will most likely build a communal campfire, but facing the front of vehicles into the circle might allow you to get more rigs around the campfire. Parking with the door to toward the center puts everyone's awning and patio space where they can view each other and share in the festivities. It also makes your access to the campfire better.
Choosing your camp site. When camping in hot weather it is always nice to have a shady campsite. Of course you aren't going to find much shade in the desert! Shade is your friend, regardless of whether you're camping a tent or an RV. Because many RVs have air conditioners, having a shady place to set up your tent will be more important than a shady place to park your RV. However, having shade for outdoor leisure activities will always be helpful in warmer weather. The only time you may want to avoid shade is if it is provided by a single tall tree that might attract lightning if there are any storms in the forecast. Camping under trees can also be hazardous if you get wind, which can cause dead branches to come crashing down on you. Another major consideration will be choosing a site that will not be in danger of flooding if there you get any rain -- locally or in nearby mountains. Avoid putting your tent or your RV in depressions that may collect water if it rains and don't ever camp in a dry wash or old stream bed. Even areas that appear to be fairly "high and dry" may be subject to runoff when it rains. I have gotten up some mornings to find the grass mat under my awning all but completely buried in mud when the previous nights' rain created enough run off to deliver a powerful stream under my RV. Although it wasn't obvious until it rained, we were parked smack in the main path of run off from nearby hills. Had I set a up a tent in the same location it would undoubtedly been flooded out during the rain.
If you are tent camping in a primitive area, your main concerns that will be different than camping in a developed campground, will be water and sanitation. You may also have to build your own fire pit (see previous post on Campfire Safety). Since there won't be a handy faucet to re-fill your water jugs, you'll need to bring along enough to last your entire trip. Lacking access to even a primitive pit toilet, you'll have to provide your own latrine. A "porta-potty" is a convenient, portable toilet that is especially appreciated by the ladies. The only drawbacks are they can be heavy, take up space, and the capacity is very limited so they have to be dumped regularly. If you don't have access to a dump station or a toilet you can haul your porta-potty to, you may fill it long before your trip is over. Other options include a simple portable toilet that consists of a toilet seat with legs like a camp stool. Plastic bags are attached to the bottom to capture the waste. You then seal the bags with twist ties and dispose of them when you have access to appropriate facilities to do so. In a more primitive situation, you will need to dig your own latrine, if doing so isn't prohibited by local regulations. If you are going to be camped in the same place for several days, you may want to make a multiple use latrine. Dig a hole or trench a safe distance from camp, trails, roads, and water sources -- always at least 200 feet from any water. Choose a spot where trees, bushes, or rocks provide some natural cover for privacy or erect a temporary shelter, such as a shower enclosure. For comfort and convenience you might want to use logs or poles to make a seat over the trench or modify a camp chair. Leave a shovel at the latrine so each user can shovel some dirt over their "deposits". Then at the end of your outing, be sure to cover the trench completely. For short term needs, dig a small hole for individual uses and cover it over immediately when you are done. Never dig a latrine near any well, lake, spring, or stream. Make sure you are at least 200 feet from any water source. Squatting over a hole is not comfortable for most people in Western society , but it is actually a fairly natural position for complete evacuation. It just takes some getting used to for most modern humans who are accustomed to sitting on the "throne".
Boondocking in an RV requires conservation of resources if you want to retain the benefits of your RV. The three major concerns are battery power, water, and holding tanks. If you use water and partially fill your holding tanks on the way to your primitive site, stop and dump your tanks and refill your fresh water as close to your site as possible before you arrive. Also make sure your batteries area fully charged either by using a battery charger before you leave home or by them charging while you're driving.
If you run your batteries down you won't have light and, if your furnace has a fan, you won't have any heat so you need to maintain your batteries. Many modern propane appliances have a circuit board that also requires 12-volt power for the appliance to operate. Start off your trip with your batteries fully charged. Then run the vehicle engine or the on board generator to charge the batteries each day. The vehicle alternator is usually the best option for charging your batteries. The vehicle alternator is higher amperage and has regulated voltage whereas the battery chargers in most converters and in many automotive battery chargers are lower amperage and unregulated. Unregulated chargers can fry your batteries. Usually running your vehicle for about an hour will bring your batteries back up to full charge. Running the vehicle engine at idle will probably use about the same amount of gas as running the generator to charge your batteries. I have an automatic battery charger set up so whenever I have 120 volt power it charges my batteries. That way, when I run the generator for any reason (power A/C, run microwave, operate entertainment systems) the batteries are charging. Conserve battery power by limiting the use of 12 volt lighting and appliances. LED lights use a whole lot less power than standard incandescent bulbs, but today they are still a little pricey in the first place. Use your gas lanterns or battery powered lanterns and flashlights whenever you can. Schedule your activities to take advantage of daylight hours or take advantage of moonlight or light from your campfire. Candles and torches might be used to illuminate campsites, giving a comfortable, almost romantic ambiance. Solar panels are sometimes a good way to maintain your batteries but you'll need some large panels, not just the little 4"x8" panels that plug into your cigarette lighter.
Your next most important resource is water. You have a limited supply of water in your fresh water tank. You can supplement that by bringing jugs, jerry cans, drums, or collapsible bladders of additional water and adding them to your tank as needed. If you RV doesn't have a gravity fill port, you may need to rig a portable pump to transfer water from you backup supply to your tank. If you have a ladder to get on the roof of your RV you might be able to carry your spare water up there and let gravity fill your fresh water tank. However, water is very heavy and carrying it on the roof isn't the best idea. Conserve water as much as possible. Save the water from the shower in jugs or a dishpan when it is running to warm up and use that for other routine tasks. Wipe off dishes with a paper towel or crumpled newspaper instead of rinsing them. When washing or showering, only run the water as needed to wet your hands, face, or body or to rinse off the soap. Turn the water off while you're lathering and scrubbing. If your RV doesn't have a shutoff on the shower head you can usually add one fairly easily and economically. You might even try developing good water conservation habits at home. It may be convenient but it is just a waste of water to let the faucet run while you're brushing your teeth. You probably won't see a noticeable difference in your water bill, but creating a habit of conservation will be helpful when you go camping where it definitely will make a difference.
Limiting water usage will also help with the third concern: filling holding tanks. By limiting water usage you will automatically reduce filling of your holding tanks. You may be able to get rid of some of the water from your gray water tank by using it to put out your campfire each evening. DO NOT use sewage from the black water tank! Its is unsanitary as well as very unpleasant and in most places is illegal. Avoid using the toilet in your RV when you can. IF there are pit toilets nearby, take advantage of them. Sometimes they smell really bad, but better to endure a few minutes in a bad smelling toilet than to have your black water tank back up and make your whole RV smell really bad for a really long time -- or have your tanks fill up and not be able to use the toilet at all! Using an outside latrine, just like tent campers, is an option and one you may be reduced to if you fill your holding tanks. There is some debate over whether it is better to send the guys out in remote locations to "water a dry bush" and conserve holding tank space or allow the liquid to help break down solid wastes. I usually vote for conserving the space when boondocking. The ladies in your group will appreciate your not filling the holding tanks too quickly! For best results, try to monitor the liquid level in your black water tank. If solids are piling up on the bottom of the thank, you'll need more liquid to maintain normal septic tank functions to break down waste and control odor as well as to facilitate dumping. How do you monitor liquid in the black water tank? About the only way is to open the toilet valve and look inside. Yccch! Not a pleasant task, but better than suffering the consequences of over filling or too much waste build up. Or just eyeball it each time you flush the toilet so you know how its doing throughout your trip. If you begin to see solid wastes piling up, drain a bucket or two of water off your gray water tank and dump it down the toilet.
Fuel is another resource you need to keep an eye on. If your on board generator uses the same fuel as the vehicle engine, the tap for the generator fuel line is usually situated higher in the tank than the motor fuel line so you don't run yourself completely out of fuel using the generator. Bring along extra fuel if you have any doubts about how long your fuel will last. Propane for you stove, furnace, refrigerator, and hot water heater is another limited resource. Use all appliances as sparingly as possible. Shut off the hot water heater when hot water is not needed for a while (like over night). There is some difference of opinion about shutting off the hot water heater. Some folks believe it will take less fuel to maintain it over night instead of re-heating it every morning. Personally, I like having hot water available all the time and not having to remember to turn it back on and then wait for it to heat to shower or shave in the morning. If you're particularly concerned about the subject, perform your own experiments and see what works best for you. Make sure your RV is well insulated and not drafty and windows and doors are closed on cool nights so your furnace doesn't run unnecessarily; limit opening the fridge. Only light the stove burners as you need them and turn them off as soon as you're done. If your stove has pilot lights, turn off the pilots when you're not using the stove. Speaking of fuel, make sure you have enough fuel to make the round trip to your remote destination. If there is any question of running out of fuel, top off your fuel tanks as close to your destination as you can get and carry extra fuel. For travel trailers you can simply bring extra propane tanks. Motorhomes with permanently mounted propane tanks can be fitted with an "Extend-a-Stay" kit that allows you to tap into an external propane tank to augment your on board tank.
Energy conservation is a usually a primary concern for both RVers and tent campers. You can minimize use of lantern fuel and battery power for lighting by matching your schedule to daylight and making use of natural light as much as possible. Conserve cooking fuels by only using stoves when actively cooking. If your RV range has pilot lights, turn them off between uses. If you choose to stay up after dark, focus on light-free activities like star-gazing or work by the light of your campfire. Of course you may need to ration your firewood too, since there are few places remaining where it is legal to gather firewood and where it is, it will probably be pretty well cleared out. One word of caution: these systems will not provide extra propane to operate a propane powered generator like those sometimes found on diesel motorhomes. The extended tanks provide vapor only and the generator requires liquied propane.
You will need to plan your provisions to make it through your entire outing without having to go to the store. Plan all your meals in advance and be frugal in your use of basic ingredients so they'll last the whole trip. Prepare foods only as you need them to avoid waste. You can save chili and stew and re-heat it for a second meal, but making too many pancakes or scrambled eggs would probably be a waste.
You may have cell phone access in some remote areas, but don't count on it. Sometimes you can increase your range by using an external antenna instead of just the tiny little one on the phone. An antenna mounted on the roof of your RV just might be enough higher and more powerful to work when standing on the ground doesn't. Of course you can try standing on the roof of your RV for emergency communications. There are also booster systems you can buy but they are pretty expensive. Many of the more recent cell phones lack an external antenna connection so check whether yours does or not before putting out money for an external antenna. Booster systems are often wireless so it doesn't matter whether your phone has an external zntenna port.
Local TV channels are available in some areas, but given that boondocking usually implies going out to some remote location, reception may be very limited. Local channels are usually picked up using a 'bat wing' antenna installed on the roof and operated via inside controls that crank it up and rotate it to obtain the best signal. Most include a signal booster to give you better range.
Satellite TV channels can be accessed using a dish on or beside your RV anytime you have a clear view of the southern sky. This usually isn't a problem when camping in the desert or on the beach, but could be in the forest or mountains. Some high end models have automatic tracking devices but you will need to manually align most satellite dishes so you need a little booklet to tell you about where to initially aim your dish. There are fairly inexpensive aiming devices that make it a lot easier to align your satellite dish. Bring along your favorite tapes or DVDs just in case. High-end satellite systems can even be used on the road, but, of course, the extra tracking and aiming components make them a lot more expensive than manual systems.
Camping off the grid is fun!
Subscribe to:
Posts (Atom)