Wecome To RVs and OHVs

This blog is all about RVs (recreational vehicles) and OHVs (Off Highway Vehicles), camping, sailing, and survival
and how they work together to provide wholesome family fun and great learning opportunities.
Many posts are intended to familiarize novice campers and RVers with RV systems and basic camping and survival
skills. But even experienced RVers and campers will enjoy the anecdotes and may even benefit from a new
perspective. Comments, questions, and suggestions are encouraged. The organization is pretty much by date of publication because of how blogspot works. Please use the SEARCH option below to find what you are looking for.

Wednesday, February 19, 2014

Practicing for Emergencies

Practice makes perfect.  You usually hear this from your music teacher or your athletic coach.  But it applies to camping and survival skills too.  In a survival situation you don't want to try to remember what you learned in class or on the Internet or from a book.  You just want to know what do do and how to do it.  To be sure you know, you have to practice.  Skills like building a shelter, starting a fire without matches, and flint knapping all require some practice if you're going to be proficient in an emergency situation.

Each camping trip is a chance to practice at least some of your survival and emergency preparedness skills.   Just setting up camp as often as you can will help you develop procedures and techniques that will expedite moving into your tent or RV if you have to in a disaster situation.

Every campfire is an opportunity to practice survival skills of building a fire without matches.  Hone your techniques for building a proper fire beginning with tinder, then kindling, the larger pieces of wood.  Practice creating cooking fires and cooking a variety foods over the campfire -- and hotdogs and marshmallows don't really count.  Learn how to bake bread on a campfire (ash cakes or bread twists).  Bake your potatoes in foil in the coals.  Practice heating water over your campfire and cooking on a grill or in a fry pan.  Learn how to do Dutch oven cooking.

Take advantage of every camping trip to inspect your equipment. It is far better to find and fix minor problems during a weekend outing than discover them when your comfort, or maybe even your life, may depend on your camping gear.  Lanterns, stoves, and sleeping bags will likely see major use during a disaster, even if you don't have to move out of your house.  Have a plan to test seldom used equipment.  Not only will it help you keep everything in working order, it can be fun!  An old adage says, "It it hasn't been tested, it doesn't work."

Your knives and axes can almost always benefit from being sharpened before use.   Each outing is a chance to practice your sharpening skills and will make using your knife or axe easier.  You might want to sharpen your axe on your electric grinder before leaving home but you can almost always hone your knife on a sharpening stone just about anywhere, perhaps while enjoying a nice campfire.

Tents may be useful even if  your residence isn't damaged to the point you have to move out.  In winter weather you might set up a dome tent inside your house so you have a smaller area to keep warm on cold nights.  Having the tent out of the wind and precipitation it will be warmer than it would be outside and keeping a tent warm with body heat or auxiliary indoor propane heaters like Buddy Heaters will be a lot easier and more efficient than trying to heat hundreds of cubic feet of living space.

Camp cooking is a good way to develop and hone skills you could use at home during an emergency.  If the power goes out your electric range will be useless.  Gas supplies may be interrupted during a local disaster.  You may have to resort to cooking on your portable BBQ, using your camp stove, or even building a cooking fire in your back yard.  One wintery night we had a power outage that lasted a couple of hours right around dinner time.  We just moved our cooking out to the BBQ grill in the back yard and though we were standing in the snow, it got the job done without having to miss dinner.

Sanitation is a major problem in most disaster situations.  If you're lucky enough to have an RV or even a porta-potty, you have a big advantage over people who may have nothing when utilities fail.  If you have experience with primitive tent camping and know how to build your own safe latrine, you won't be dependent on any kind of modern technology.  One of the biggest health problems in refugee camps is cholera, caused by poor sanitation.  During a disaster situation, a lot of people may not give a crap about sanitation, but they sure produce a lot of it and it can be deadly!  You may be able continue to use your residential toilet even if your water supply is disrupted -- if the sewer system is still in tact.  Just manually fill the toilet tank with buckets of water.  Even dirty water from a creek or pond will do.  Don't waste potable water for flushing your toilet!  You can make an emergency toilet from a 5-gallon bucket and a contractor trash bag.  For an even more pleasant and sanitary experience, buy some "wag bags".  These are heavy plastic bags will with a compound inside that forms gel around waste products, helping to avoid spills and control odors.

Hopefully you won't have many opportunities to practice emergency medical procedures so you may have to participate in regular drills -- or create your own -- so you can be ready in case of an emergency.  Joining your local C.E.R.T. program and attending refresher courses every  year to so is one good way to accomplish this.  Renewing your first aid and CPR certification as required should go without saying.  Check the expiration on your card and try to get re-certified BEFORE it runs out!

Stay in practice!

Thursday, February 13, 2014

Sharpening Your Tools

Several tools commonly used for camping have sharp edges that require periodic maintenance and special protection.  These include your kitchen cutlery as well as axes, hatchets, and other knives.  Even shovels could use a good sharpening once in a while.

Kitchen cutlery and other knives may be sharpened with a knife sharpener or a sharpening stone.   Some manual knife sharpeners only require you to drag the knife through a slot to put a new edge on the blade.  Electric knife sharpeners will probably be easier to use and more effective but they might take up too much room in an RV or camp kit and, of course, require electricity.  So-called automatic knife sharpeners are better than nothing but will not produce the same quality edge you can achieve with a good sharpening stone and a little skill.  A sharpening stone is small so you could take it anywhere, but you need some training and practice to be able to use it well.

Is it really worth the effort to sharpen you tools?  Let me share a story.  A father and his son volunteered to help weed a church garden.  Shortly after they started an older an showed up working on the rows next to them.  They were amused at how slowly and deliberately he worked and thought he was just wasting time when he stopped every few minutes, pulled a file out of his back pocket, and gave his hoe a few strokes.  The father and his son kept actively hacking away at the weeds the whole time.  At the end of the day they were surprised to see that the old man had hoed twice as many rows by himself as the two of them had done together!  His steady, deliberate effort with a sharp tool really paid off more than all their hard work.

Cutting edges should be protected for two reasons:  1) to keep the edge from being dulled by contact with other tools and 2) to avoid injuries to people, pets, or other items in storage.  Axes,  hatchets, and saws should be fitted with blade guards.  Kitchen cutlery should be stored in a cutlery block or on a magnetic knife holder.   I recently saw an innovative solution.  The RV owner had made thin blocks that attached to the side of the pantry in his RV.  The knives were stored in individual slots and when the door was closed they were prevented from falling out during travel.  Each block was less than an inch thick so they stole very little room from the pantry shelves and the knives were secure in transit and always handy to use.  Be sure to store them with the sharp edge up so it doesn't rub on the block and get dull.   If you leave them just bumping into other utensils in the drawer they will get dull AND you're likely to cut yourself rummaging through the drawer when you are looking for something.  Hunting knives and other fixed blade cutting tools should be kept in their scabbards when not being used.  Folding knives should be kept closed.  Blades on most all tools should be coated with a light oil or grease when put in storage for any significant length of time to prevent rust.

Some other tools, such as shovels, hoes, and saws, also need to be kept sharp.  While some people fear that sharp tools are dangerous, dull ones are actually more dangerous.  Dull tools require more effort, increasing the risk of losing control and are more apt to bounce or slide, also causing a loss of control and increasing the risk of injury.  Sharp tools are also more efficient to use, saving you time and energy.  Saws require some special tools to set the kerf (offset) of the teeth but most tools can be easily sharpened by hand using common tools like a file and a sharpening stone.  Chain saws require a rat tail file of a size specific to the teeth on the chain.  Chain saws should be sharpened using factory specified angles to ensure proper performance.  Axes and hatchets can be partially sharpened using a grinder but may require a more sensitive touch for final finishing.  Knives should not be sharpened on a grinding wheel because the wheel is likely to create too much heat and damage the thin blade.

Most camping activities are relatively sporadic and short term, even though most of us would like to be able to spend more time.  Unless you are planning an extended camping trip, you can probably just make sure all your tools are sharp before you leave home.  But if you expect to use your tools a lot -- or want to be prepared to maintain them during an unexpected extended emergency -- make sure you bring along proper tools with which to sharpen them.

Shovels, hoes, and similar tools should be sharpened using a file.  Avoid using a grinder because it will generate heat that diminishes the temper and weakens he blade.   Bent spots on shovels can be pounded flat using a hammer on an anvil before sharpening with a file.  Knives should be sharpened using sharpening stones.  You will probably need more than one stone with different levels of coarseness. Use a coarse stone for initial shaping and removing chips and progressively finer stones for finishing.  You can make your own set of sharpening stones from various grades of wet-and-dry sandpaper.  Glue strips of sandpaper about 4"x8" onto a piece of glass or other hard surface (a plastic cutting board would be ideal).  It may take some practice to get a feel for the right angle to hold the blade to get a good edge, so be patient and do a lot of practicing.  Start with the coarsest grit and work your way to finer grits to get a razor sharp edge.   When sharpening a shovel or hoe, start the file away from the edge and file toward the edge.  

When sharpening a knife on a whetstone, wet the stone, then start with the blade at one end and drag it gently back to the other end.   Use only a light pressure, not a harsh, grinding force.  Slide the blade sideways as you pull it back so you work the entire length of the blade.  Some folks prefer to push the blade toward the stone rather than dragging it back.  You might want to try it both ways to see which way works best for you.  For best results soak your whetstone for 5 to 10 minutes before using it and keep the surface wet.


Axes and hatchets, being made of heavier blocks of steel or iron, can be sharpened with a grinding wheel.  But you'll still want to exercise some caution to avoid over-heating and damaging the blade.  If the blade starts getting red hot in spots, it is overheating. Stop grinding and cool the blade before continuing.  If  you overheat the blade it may burn a nick in the edge.  If you see a dark bluish stain on the metal you have created a hot spot and probably ruined the blade or at least removed the temper  and weakened the blade in that spot.

Other hand tools that benefit from periodic sharpening include chisels and screwdrivers.  Most of us probably don't carry chisels with us when camping, but both wood and stone chisels work best when sharp.  Wood chisels require more refined sharpening than stone chisels and need a polished edge like a knife to be most effective.  Stone chisels can usually be sharpened on a grinding wheel, taking normal precautions against overheating. Flat screwdrivers, while not normally considered cutting tools, can become rounded and worn and may benefit from light sharpening to restore the flat surface and square edges.  You should able to that with a file or with gentle use of a grinder.  About the only use I've found for worn out or damaged Phillips screwdrivers is to grind them into a point to be used as a punch or an awl.

Scissors require special sharpening techniques but some sharpeners designed for kitchen use have a scissors sharpening slot that makes it pretty easy.  If you have trouble sharpening your scissors, take them to a professional or replace them.  While scissors are often general purpose tools, there are variations designed for different tasks.  Kitchen shears are meant for cutting produce and may not be fine enough to cut paper cleanly.  Special snub-nosed scissors are used for cutting bandages so you don't poke your patient with the sharp point found on most scissors.  I've seen scissors advertised as being strong enough to cut a penny and found they lived up to their claims.

Be sharp!

Sunday, February 9, 2014

Doing Laundry In Camp or On Your Boat

Do Laundry in camp?  Yeah, right!  Most of us prefer to just bag it and take it home.  And that's all right for weekend outings.  But for longer trips you will have to make other arrangements.  Some high end RVs have washers and dryers, but using them while boondocking depletes your fresh water fast and fills your holding tanks quickly.  I had a large Class A with a washer and dryer for several years but never really had a chance to use it.  The one time I tried to use the dryer to dry some wet riding gear I found it had been sitting idle for so long that the rollers had gotten flat spots on them and it sounded like it was full of big tennis shoes even when it was empty!  Dis-use can be really bad on lots of pieces of equipment.  Some RV parks have coin op washers and dryers or you may be able to find a nearby laundromat when traveling.

When you do have to do laundry in camp, your camping style and location will determine your options.  Recent surveys indicate a majority of RVers, perhaps as much as 3/4 or more, prefer camping in a full service RV park.  Some high end campgrounds have an on site coin op laundry.  In which case doing laundry means just packing it and hauling to the laundromat.  But in more primitive situations you will have to make do with the resources you bring with you.  Regardless of what facilities may or may not be available and whether you'll try to do laundry in camp or take it home with you, you'll need to have a procedure for collecting and storing dirty clothes and linens.  We like to use individual net laundry bags for each person.  If you're camping near a town you may be able to go to a laundromat if you run out of clean clothes or linens before your trip is over.  Otherwise, you are going to have to figure out a way to wash your clothes in camp.

Most RVs don't come with clothes hampers and tents never do so you'll need to bring along some laundry bags to collect and corral your dirty clothes.  I picked up some inexpensive mesh laundry bags in several colors at my local dollar store so everyone in our family has their own personal bag for dirty clothes.   More recently I found some small collapsible hampers that only take up about as much room as a saucer when they're empty.  Another option is to stuff your dirty clothes in a plastic garbage bag.  Using the mesh bags allows moisture to evaporate and discourages proliferation of odor-causing bacteria, but, depending on how dirty the clothes are and what kinds of soil are on them, they may allow odors to contaminate the space in which they sit.  Hanging bags of dirty clothes alongside the clean clothes in your closet isn't a good idea.  Plastic bags will contain the odors but may promote development of additional odors, mold, and mildew inside the bag if kept tightly closed for too long, sometimes creating odors or stains that are difficult or impossible to remove.  One idea is to hang mesh bags in sunlight and fresh air to dry a few days to let nature control odors before you tuck them away in your RV or tow vehicle.  The UV in sunlight and the ozone in the air are pretty effective antibacterial and deodorizing agents.  Then find someplace to put them where they won't foul clean clothes or stink up your living space.  However, sunlight may cause fading or other damage to some fabrics.

There are portable, table-top, human-powered clothes washers that can be used in RVs, boats, or even when tent camping.  They are relatively light weight and inexpensive, but they also have a limited capacity, take a lot of muscle power, and are not the best options for heavy duty tasks like washing dirty jeans.   But they might be worth checking out, especially if you find  yourself frequently running out of things like T-shirts or dish towels.  In a pinch you can use a 5 gallon bucket and an ordinary sink plunger.  It isn't an elegant solution,  but it beats banging your clothes on a rock and it works!  That being said, if you are camping by water you might be able to at lease rinse out your clothes there  Be thoughtful of other users and avoid contaminating the water with soap or detergent..

You can always resort to washing out your clothes a sink, tub, or dishpan.  It is tedious and time-consuming but will work in a pinch.  Then hang them out on a clothesline, trees, or bushes to dry.  There are several clothesline options for RVs, ranging from a simple coil of rope or cable to elaborate racks that attach to the trailer hitch.  If you're only rinsing out a couple of items you can probably hang them in the shower on rainy days, but hanging them outside will usually dry them faster and gives them a fresher scent from being in the sun and fresh air.  Of course, if you're camped next to a cattle feeding lot or other source of foul odors (like if you're stuck next to a latrine!) you might not want to hang them outside.

Avoid hanging lots of wet laundry inside your RV.   It will greatly increase the interior humidity and may contribute to mold and mildew in hidden places.  It a worst case scenario, it might even put enough moisture on the walls to loosen wall coverings.  High humidity might attract and convert dust to mud in curtains, carpet, upholstery, and bedding.  High humidity usually translates to uncomfortable.  If you must hand wet laundry inside, hang it in the shower or over the tub, open the vent, and keep the bathroom door or curtain closed to minimize high humidity in the rest of the living space,

You will probably want to use the same detergent you usually use at home.  Switching detergents often leads to skin irritations and you sure don't need that when camping.  My personal preference for camping is a liquid detergent because it takes up less room than a big box of powder and its easy to measure using its own cap.  Just make sure to keep the lid on tight! Camping is not a good time to experiment with a different detergent, so be sure to try it out a home a few times if you normally use a powered detergent.  Having some spot treatment can help you deal with unusually difficult stains you might get while camping.  A good mechanics hand cleaner like Goop or Go-Jo does double duty -- cleaning greasy hands and pre-treating nasty stains.  WD-40 will also work to pre-treat heavy grease stains that often result from working on vehicles.

Tent campers might be able to wash out their clothes in the dish washing sink sometimes available near the shower house.   Lacking that you will need to wash them out in a basin or bucket at your campsite.  Washing clothes in warm water is usually better than washing them in cold water, but even a cold water wash might be enough to get you through until you can get home.

Doing laundry in a survival situation is probably going to be fairly low on your priority list, but it isn't something you should ignore entirely.  Keeping your clothing as clean as possible can help you avoid disease, make you  more comfortable, and more pleasant to be around if you have any companions with you.  It will also help you feel better too.  In a survival situation you aren't likely to have detergent and water will probably be scarce.  If you do have access to clean water, rinse your clothing out and hang it out to dry when it gets dirty.   Or just jump in the water with your clothes on and wash both you and your clothes at the same time.  You can also use the old-fashioned method of pounding your clothing on a rock to loosen stubborn dirt, but take care that you don't damage your clothing or wear holes in them.  Worn out clothes will be more of a problem than dirty clothes.  Take advantage of "wash day" to give yourself a good cleaning too.  Lacking enough water to wash your clothes, at least hang them out in the sunshine to dry and air out occasionally and give yourself an "air shower" or smoke shower at the same time.  Sunlight and fresh air will help to kill bacteria and freshen both  your body and your clothing. Sagebrush smoke is particularly good at killing bacteria on your body and in your clothes and leaves a pleasant scent of its own.

Avoid hanging wet clothing inside your tent to dry.  If you're stuck in rainy weather and have no other options, make sure the wet clothes don't drip onto your sleeping bag, pillow, back pack, or dry clothes and blankets.  Place a tarp or large plastic trash bag beneath them to catch drips. Keep the windows open if you can to allow as much air circulation as possible.  Trapping a lot of damp air inside  your tent may encourage the grow of mold and mildew, which can be unhealthy as well as unpleasant as well as slowing the drying of your clothes.  The moisture from you breath is already enough that on cool days drops will condense on the inside of your tent.  The last thing you need is to add to the humidity by hanging a batch of wet laundry inside.  It might be a good way to create your own private rain shower inside your tent!

Doing laundry on your boat is much like doing laundry in an RV.  However, you may be able to rinse out lightly soiled clothes in the water your boat is sitting in and hang them on the lifeline to dry.   Probably don't want to do that in salt water and might be prohibited or at least unwise if your fresh water is also a source of drinking water.   If you use detergent make sure to either contain the contaminated water in your holding tank for proper disposal or use safe, biodegradable soap.  Avoid hanging wet laundry inside the cabin as it will increase humidity and possibly cause increased moisture problems.  Best to hang laundry outside to dry if you can.  Hanging it in the cabin will increase humidity and condensation inside.  Sunlight is also a natural antibiotic that kills germs and reduces odors.

Clean up!

Wednesday, February 5, 2014

RV Extended Service Plans

The Good Sam Club offers RV Extended Service Plans that are essentially repair insurance.  They are NOT extended warranties, but are a unique insurance plan to pay for covered repairs.  They are available for just about any kind of RV but there are age, mileage, and purchase price restrictions.  For more details see Good Sam ESP qualifications.

An Extended Service Plan could be of great value if your RV breaks down and you're far from home.  Major repairs can be very expensive.  We paid over $16,000 to have a rebuilt engine installed in our Class A Motorhome and I've seen transmission repairs on some rigs that cost about as much.  The premiums for these plans may seem kind of expensive, but considering the huge benefits they deliver, including peace of mind, they are probably well worth it if your rig qualifies and you can afford the premiums.  It is very likely that even one covered claim will recoup just about all of your premiums.

Keep in mind that insurance companies make money because their average payout is about half the average premiums they collect so statistically, you probably won't ever use an extended warranty or extended service plan.  But, just like medical insurance, its really nice to have when you need it!

Dealers often offer extended service plans with the purchase of one of their units.   The premiums and coverage of these plans can vary widely, so know what you're buying. Pay special attention to the specific coverage and the requirements for submitting a claim.  Many times you must have the work pre-approved or your claim will be denied.  Look carefully at ALL the restrictions.  Many policies exclude parts costing less than say $15 and you could be stuck with hundreds of dollars in labor if the failed part is below the minimum, even if the subsequent damage amounts to thousands of dollars.  Given the high cost of many kinds of RV repairs, an extended service plan might be worth its costs.  I generally don't buy extended warranty coverage on anything unless it is really inexpensive.  I've found that too often I don't use it so its wasted money.  Only YOU can determine if it a plan is right for you.  

What can you do if your rig doesn't qualify?  Well, other than upgrading to a newer model that does qualify, about all you can do is be meticulous about performing regular maintenance and keeping your rig in good shape.  Regularly inspecting your rig can help you detect issues that could lead to expensive repairs before they get to that stage.  For example, engine failures are often caused by loss of oil. If you detect signs of an oil leak, get it fixed right away before it leads to engine failure.  Same with coolant.  Proper chassis and wheel bearing lubrication will prolong chassis life.  Automatic transmissions all too often tend to fall in the category of "out of sight, out of mind".  Check the fluid level and condition regularly.  The fluid should be dark red.  If it is brown or black or smells burned, the transmission has been overheating and needs attention.  Transmissions have internal filters that are not typically able to be changed by vehicle owners, but they still need to be maintained at designated intervals to protect the transmission.  It may be worth while to have a transmission temperature gauge installed so you can detect a pending failure before it becomes catastrophic.  Loss of coolant is another frequent cause of problems.  Often it may as simple as a radiator or heater hose clamp that needs tightening or a hose that needs to be replaced.  Leaking coolant will usually give off a distinctive odor, even if you don't see steam coming out of the engine compartment or green puddles under the rig when you stop.  By the way, not all antifreeze is green these days, although most of it still is.  Special high-mileage antifreeze might be orange and some of the supposedly environmentally safer stuff used in OHVs is blue.

Many drivers (and passengers) enjoy listening to the radio or other audio devices while on the road.  I have always preferred to listen to my vehicle so I can detect changes in how it sounds, hopefully before any serious damage can occur.  My dad was an auto mechanic and over the years I've learned to recognize a number of typical problems.  Valve clatter is often an early sign of serious loss of engine oil.   This is a fairly high-pitched rapid tapping sound in the engine that varies according to RPM.  Wheel bearings and universal joints make a distinct and usually constant whirring or whining sound.  Worn differentials sing their own sad songs:  a worn front pinion bearing will whine or growl when coasting, the rear will complain under load.  Being able to hear and recognize changes in the sounds your vehicle makes can help you detect problems and correct them before they lead to catastrophic failure.  I once tried to ignore the tell-tale sound of a bad universal joint during a 2000+ mile trip, hoping to limp my 35' Class A back home where I could make repairs.  I didn't make it.  The joint failed about 150 miles from home and the front most of three drive shaft segments dropped onto the freeway.  I had to replace the entire drive shaft segment to get the rig back on the road.  I was very lucky it didn't catch in something on the road and punch a hole in the floor or send my RV pole-vaulting!  Had I stopped to take care of the bad U-joint when I first heard it, I would only have had to replace the U-joint itself.  The entire segment of the drive shaft had to be replaced.  While you're at it, attune yourself to how your vehicle feels.  Be alert for unusual vibrations or strange "clunks" that may indicate drive train or suspension problems. Strange clunks are not always significant mechanical problems.  I read of a motorhome owner who spent tons of money on a "shotgun approach"  doing many random repairs to fixing an annoying clunk.  He finally decided to get rid of the vehicle and, while cleaning it out, discovered a full soda can under the driver's seat that turned out to be the cause of all the clunking.  Having invested so much in unnecessary repairs, he decided to keep the rig and get back some of his investment.  A loose piece of exterior trim once drove me crazy.  I thought the brakes or suspension was coming loose until I found the offending item.  Simply trimming off the loose end solved the problem before it did any serious damage to the finish.

Keep 'em running!

Monday, February 3, 2014

Recycling While Camping

Recycling could mean riding your bicycle or dirt bikte on the same trail again and again.  But what normally comes to mind is re-processing refuse into productive avenues.

Recycling is gaining more and more attention.  While collecting recyclables when we are camping is sometimes inconvenient, camping provides many opportunities for us to recycle goods and materials from home that would otherwise end up in land fills.  What better way to recycle kitchen utensils, tools, linens, clothes, etc. than to put them in your camping kit!  Although the current recycling trend is often seen as the domain of environmentalists, the idea has actually been around a long time.  Growing up in a rural environment, we re-used almost everything.  My dad built our first house from lumber, bricks, and stones salvaged from an old house he bought to tear down for the materials.   I like the old saying:  "Use it up, wear it out, make do, or do without."  It is a much wiser and more efficient way of living than our current mostly disposable lifestyle.  In my mind way too many current consumer products are designed to be thrown away rather than repaired.

Think recycling is something new?  I don't think so.  As mentioned above, here is an old adage "use it up, wear it out, make do, or do without" I learned from my grandparents.  That is a really good concept to apply when camping, especially when boondocking.  When my dad built our first house (in the country) he bought an old house in town that was being torn down and dismantled it.  We salvaged wood and bricks and stone window sills and some of the fixtures.  The entire structure of our house was built from recycled lumber and the chimney and patio from used brick.  We had an antique bathtub salvaged from that same house before they became fashionable.

Buying a pre-owned RV or other used camping equipment is in itself a productive way of recycling.  It is a good way to both save money and "give stuff a second chance", as the billboards for some popular thrift stores say.  RVs and camping gear often get very little use so pre-owned equipment can be a excellent bargain.  I've even found brand new camping equipment in thrift stores and garage sales.  Owners either bought stuff or received gifts that they never got around to using.  I find garage sales a good place to shop for gadgets I want to try out so I don't invest a lot of money at full price in case they don't work out.  Even when you buy something new, it is only new the first time you use it, so why pay extra for that one first use?

You can recycle many household items as camping items instead of throwing them away when you upgrade.  The old 2-slice toaster that your family has outgrown is a handy addition to your RV.  It may take longer to make enough toast for everyone, but its small footprint and lower power consumption may be appropriate for camping.  You can create your own fire starters from old egg cartons, sawdust, and melted down candle stubs.  If you happen to enjoy a rural lifestyle where you have large animals to feed, you might recycle the twine from hay bales for camp use.  Old pots and pans and other kitchen utensils often find new life in your camp set, adding convenience to your camping at no cost.  Towels, sheets, blankets and other linens that may no longer be suitable for entertaining company at home are perfectly suited to enhancing your camping experience without the worry of damaging costly items.  Likewise, some old clothing is handy to have in your RV or camp kit.  It may not be as attractive or fashionable as you might like, but having clean, dry clothing has saved or added comfort to many an outing.  Organizing extra tools into a portable tool box can provide an attractive option to getting stranded by a motorhome, tow vehicle, or OHV breakdown and having to call for expensive towing or road service.

The common understanding of most recycling applies mostly to what would otherwise end up in the trash:  primarily disposable containers.

Recycling of aluminum cans is one of the most common and most popular of recycling programs.  Of course one thing that contributes a lot to that is reclaiming the 10 cent deposit we pay on every can.   Since we often enjoy a lot of cold beverages in cans when we are camping we often accumulate a lot of empty cans.  Crushing them is one way to reduce the volume for transport but not all recycling places accept crushed cans, so don't crush yours unless you plan to take them where the cans are weighed and it doesn't matter if they are crushed or not.  Crushing cans is easy.  There are can crushers available but most people just stomp on them.  Some guys think it is macho to smash them against their foreheads, but I certainly don't recommend it!

These days recyclables must often be sorted by type.  That means you need separate bags for things like glass, cans, and recyclable plastic.  To add to the complexity, not all plastic bottles are recyclable.

Traditional recycling in camp or on the road will take some extra effort.  You'll probably need to separate your recyclables and commit some space to storing and transporting them and space is often a a premium.  It doesn't take a lot of effort or consume a lot of weight and space to stomp down your aluminum cans and bring them home and you can usually get paid a little bit for them.  Plastic and glass containers are usually somewhat more difficult to manage and usually don't produce payments.  You can recycle newspapers and paper towels by using them to wipe your plates before doing the the dishes, then using the crumpled papers to help start your campfire or charcoal BBQ.  Some plastics can be disposed of in the campfire, but always avoid breathing the fumes.  And remove the cap from bottles or they could heat up and explode, sending hot embers all over and perhaps into your hair or lap! 

Hauling stuff home to be recycled can be messy and inconvenient but don't feel too bad about disposing of it in proper trash containers in camp since doing so might lighten your load and reduce fuel consumption on the way home.  Just don't leave it lying around to compromise the environment.  Besides that, about the only things being recycled that really make environmental and economic sense are lead acid batteries (car batteries) and aluminum cans.  The benefits of recycling paper, glass, and plastic are debatable.   At least one expert on recycling that I read recently suggested the only things that make good sense to recycle are those for which you get paid.  If there isn't enough money in recycling something to pay an incentive, the process is probably not economically nor environmentally sound.  In some cases recycling actually takes more energy and costs more and leaves a larger "carbon footprint" than using raw materials!  Reading that made me feel a little better about tossing trash that was otherwise a nuisance to handle for recycling.  He cited lead acid batteries and aluminum cans as examples of good things to recycle.  Plastic and even glass bottles and newspapers didn't make his cut.  I use old newspapers to start fires and to clean windshields and BBQ grills.

Is recycling worth the effort?  There are differences of opinion, even among recycling experts.  I once read an article from an recycling expert from UCLA who conclude that only those items that you get paid for, like lead batteries and aluminum cans, are worth recycling.  And it goes way beyond your personal renumeration.  If an item isn't worth a manufacturer paying for, it typically isn't worth the time, effort, and the cost of collection and processing both in economic and environmental terms.  Another article I recently read from the University of New Hampshire, claims that in many cases, recycling actually wastes more resources than it saves.  Given all the various opinions, I have personally agree with the UCLA expert:  if industry is willing to pay for it, it is worth recycling.

Recycling goods and materials from home is a good way to minimize your camping costs and reduce your environmental impact at the same time.  Recycling in camp helps keep our camping and staging areas clean.  If choose not to recycle, make sure you dispose of all containers safely.  "Pack it in, pack it out"!

Emergency Lighting

When most of us think of emergency lighting we probably think of flashlights, candles, and oil lamps.  These are all good things to have on hand, both at home and in camp.  Of course, your camp lanterns (gas or battery) are good sources of illumination during a power outage at home as well as in camp.  I like to have at least a couple of old-fashioned "hurricane" lights -- oil or kerosene lamps -- for indoor use at home when the power goes out.  They are attractive as well as effective.  If you don't like the smell of kerosene, use scented lamp oil or liquid paraffin (which has no smell).   Most of my oil lamps are made of glass and, of course, they all have a class chimney, so they are somewhat fragile so they might not be your best choice for camping or in earthquake country.  Old-fashioned kerosene lanterns, being made mostly of metal and having a metal cage around the glass chimney, are a little sturdier and perhaps a better choice for camping.  At home I fill several oil lamps with citronella oil and use them on my patio tables to help keep the bugs away as well as adding pleasant ambiance to after dark gatherings.

For "routine" emergencies in camp, add emergency electric lighting to your RV or camp kit.   Most RVs come with at least one outside porchlight, but you will probably find it convenient to install additional lights at other locations.  I added one on the front of my enclosed motorcycle trailer to illuminate the hitch for nighttime hook ups.  I scrounged up a couple of very bright flood lights salvaged from on old ambulance and installed them on the curb side and rear of my motorcycle trailer that give me excellent illumination for nighttime OHV repairs in camp.  I even put the rear light on an exterior 3-way switch so I can turn it on and off without having to go inside the trailer.  By the way, I wired all the trailer lights using residential light switches in convenient locations.  They are definitely overkill from an electrical standpoint, but sure make finding and using them easier than fumbling with tiny little toggle switches.  Having some battery powered lanterns and plenty of extra batteries is always a good idea for both RV and tent campers.  They can also be used at home during power outages or other emergencies.  It is always good to have either battery or gas lanterns to help conserve your RV or vehicle batteries in camp.

Modern LED lanterns are a real boon for camping and emergencies.   They were quite expensive when they first came out but you can often find them for $10 or so these days.  Since LEDs use far less power than incandescent bulbs, the batteries (or solar charge) will last much longer.  I once inadvertently left a 17 LED lantern on overnight in my barn and it was still burning bright the next morning and still worked for months afterwards.  An incandescent light would have drained the batteries completely in just a couple of hours.  Rechargeable lanterns may be useful if you have access to power to recharge them, but I like to have at least some with replaceable batteries as a hedge against power outages and extended overcast days.  I prefer simple battery powered lanterns for emergencies.  They are usually less expensive and I can stock extra batteries to outlast a power outage and don't have to worry about them running down before the sun comes up or comes out to recharge them.  Solar powered lanterns would be good for camping and home emergencies, but probably not for exploring caves and mines.  They are good for tent lights if you remember to put them outside each day to be recharged.

But what if you are away from camp and find yourself in a survival situation?  What options do you have for emergency light then?  A campfire will provide general illumination for some routine tasks around camp.  Campfires provide comfort, make a good beacon to assist rescuers to locate you, and will help keep wild animals at bay.  But they are not very portable if you need to move around at night.  

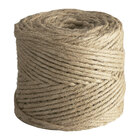
Torches have been an historic source of light for centuries.  To make a torch you'll need a handle (a stick will do),  some kind of wick material (cloth, shredded bark, dry moss, etc), and fuel (wax, sap, petroleum, vegetable oil, animal fat).  In a survival situation where you have to make do with whatever is at hand, you may be able to make torch from shredded bark and tree sap.  Animal fat can also be a source of fuel.  You can make a simple candle by putting a wick in a stick or tub of butter or fat.  Most cooking oils are flammable enough to be used to make candles or torches.  If you have access to vehicle fuel like gasoline and diesel, you may be able to use that to power a torch, but exercise extreme caution since these fuels are highly volatile and could easily get out of control.  They also burn fast so they don't last very long.  Gasoline fumes are extremely explosive, so don't work with gasoline in an enclosed space.  In a true emergency situation you could drain motor oil from an engine and use it to fuel your torches.  Motor oil will probably burn slower than gasoline torches, but it will also give off nasty, black, sooty smoke.  No matter what fuel you are using, take care to avoid spills, especially on your hands or your clothing.  The last thing you need is for your clothing to become the wick and YOU become the fuel!  Even skinny people have enough body fat to fuel a fire once it gets started.  In a survival situation you may have to start a fire without matches to light your torch.

Always test your torches outdoors before attempting to use them inside a cave or a structure.   Some fuels will burn fairly cleanly, others, like old motor oil, will produce a lot of nasty, black smoke.  Sometimes there will be a lot of nasty smoke initially but things may clear up a bit after the torch has burned for a while, warmed up, and gotten rid of excess fuel.  It  takes a little time for a wick to warm up and function properly, so be patient.  Always be careful with a torch so you don't accidentally start something around you on fire.  The last thing you need in an existing emergency is to add fighting or escaping from a fire!  Avoid using torches anywhere they could cause a fire.

You can make an emergency candle from a tube of ordinary lip balm.  One of the easiest methods is to simple insert the bottom end of a wooden match into the tube and press it down until the flame, when you  light the match, it is close enough to draw up fuel from the wax in the contents.  I've also seen people make wicks from cotton balls or toilet paper by rubbing them between their hands until they form into a string and insert them in a hole pressed into the center of the tube.   Since the main fuel being burned is wax, there is usually little smoke so a lip balm candle can even be used in a tent if you take appropriate precautions to maintain safety.

Chemical light sticks. commonly know as "glow sticks" are sometimes useful in an emergency.   They are especially good for comfort lighting -- alleviating some of our natural fear of the dark -- but usually are not bright enough to be good work lights and might not be adequate to scare off wild animals.  They are light weight, have no risk of igniting nearby flammable materials, and are easy to store, transport, and use.  They do have a limited shelf life, so keep an eye on expiration dates.  However, it isn't like there is a magic switch inside that turns off when the expiration date is reached.  I still have viable glow sticks that were "retired" from a company emergency program that are now nearly 20 years out of date!  I have observed that if the sealed packets have gone flat, the glow sticks are dead but if they are still "puffy" there is good chance the lights will still work.  They may not last as long as fresh ones, but in an emergency they are certainly better than nothing.  I have found a variety of glow sticks at Dollar Tree, include some giant ones about 1 1/2' long, so they don't have to be expensive. They are also safe to use in enclosed spaces and won't cause an explosion if there is a gas leak.  I carry one in my dirt bike tool kit.  It wouldn't be bright enough for nighttime repairs but I could use it as a signal to help rescuers locate me and for my own comfort.  To be honest, in a situation like that I would probably prefer a small fire, which would also help keep me warm during cold desert nights,

You may come across  Internet articles on making glow sticks from Mountain Dew soda.  Sounds like fun but beware that these are pranks or hoaxes!  There are even YouTube videos that demonstrate the process, but all my research tells me they are faked.  Don't waste your time, energy, or a possible source of necessary hydration and sugar energy trying to make glow sticks from soda pop!  Drink the soda and go find some good material to make a torch.  BTW, the popular "myth" of turning a two-liter bottle of Diet Coke into a rocket using Mentos does work but that is, of course, irrelevant, except perhaps for entertainment value.

You can use an ordinary milk jug as a diffuser to turn a point-source of light like a flashlight or headlamp into effective area lighting.  Shine a flashlight or place a candle next to a milk jug filled with water.  The water and the translucent plastic jug will diffuse the light to provide pleasant area lighting.  A battery operated LED "tap light" can similarly be fastened to the inside of the lid of a mason jar to create diffused area lighting.

In a survival situation, you may be able to cannibalize your vehicle (car, truck, RV, boat, OHV) for lights.  This isn't something you would want to do unless it was a serious survival scenario since ripping out lights and wiring is pretty destructive and you probably won't have any way to recharge the batteries once you've run them down.  Speaking of batteries, you can use batteries and 0000 steel wool to start a fire.  Sometimes even a couple of flashlight batteries provide enough current and even a partially discharged car or motorcycle battery may still have enough juice left to light up the steel wool.  Steel wool doesn't make a good torch but it is excellent tinder to start your fire or light your torches.  I've seen demonstrations of using an ordinary D-cell flashlight to start a fire.  Carefully break the bulb so you don't damage the filament.  When the light is turned on, the filament will be hot enough to ignite well-prepared tinder.  Why would you destroy a good flashlight?  Well, you might need a fire for warmth or cooking or you may need torches that will last longer than the flashlight batteries.  Personally I'd probably save my flashlight and use it to look for other ways to start my fire.

Light up!

Saturday, February 1, 2014

Camping Uses For Twine

Ordinary binders twine is an excellent resource for many camping tasks.  It is inexpensive -- a ball of over 500 feet is around $4.00 at home and garden centers.  If you have livestock, save the twine from hay bales.  The uses for twine in camp are endless, from tying up bundles of wood to holding up your pants if your belt breaks (been there, done that!).  You can use it to replace or repair broken ropes on tents or add extra support or tie downs as needed.  You might use it to sew up tears in tents, awnings, packs, or clothing.  You can use it to lash pieces of wood together to make rustic or emergency camp furniture or shelter.  You can string it out to mark the limits of your camp site, something that is sometimes helpful for setting reasonable boundaries for your kids to roam freely or to discourage unwanted visitors.  You can use it to tie tarps together when you need a larger one and to anchor tarps to trees and vehicles to create canopies for shade or weather protection or just to secure them over equipment so they don't blow away.   You can use it for a temporary clothes line.  You can even twist strands of twine into larger ropes if you need something stronger or separate it into individual strands you can use as thread.  Twine is inexpensive and takes up little room in your RV or camping boxes.  Even a small, softball sized ball of twine will be enough for many uses but it often comes in a soccer-sized ball that makes it very cost effective and will probably last you for years and years of camping and  home use.  I have even found packages of 3 small spools of light weight twine at Dollar Tree, so it certainly doesn't have to be expensive.  Just one of them is sufficient for most camping applications.

                                                            5-Ply Natural Biodegradable Jute Twine 1 lb. Tube

If you find yourself in a survival situation, you probably won't have a big ball of twine with you.  In this case it could be helpful if you know how to make your own emergency cordage.  Most of us don't have the knowledge, skill, or tools to spin our own yarn or ropes, but in an emergency you might make due with vines, weeds, or long grasses, which can be useful for tying sticks together to make a shelter.  It is possible to make string or rope from smaller fibers, but it is time consuming and not something most of us would be able to accomplish in a survival situation without a lot of practice beforehand. Here is a link for How To Make Your Own Rope.  They make it sound pretty easy, but I wouldn't want to bet my life on this skill without having practiced it first.  Having a ball of twine in my rig or my pack would be a LOT easier and faster!

You can use twine or other cordage to bind sticks together to make a shelter and to create camp furniture.   You will also find it handy for tying up sleeping bags, sleeping pads, tents, etc to keep them from unrolling.  You will probably use it for tying loose objects onto your pack or maybe just your belt when you need to keep them handy.

If you're going to be successful using twine or any other type of cordage, you'll need to have some knowledge and skill tying knots.  Most of the basic knots you will find useful are the same ones taught to Boy Scouts, so you could find information on how to tie them in a Boy Scout manual.  Or you can find lots of good instructions and videos on the web.  Here is a link to instructions for many popular Boy Scout knots. You may be surprised by how many different kinds of knots there are -- way to many for me to delineate here.  There are different knots for different uses.  For example, you use a different kind of knot to connect two ropes together depending on whether they are the same or different diameters.  One of the most commonly used knots is the square knot.  It is easy to tie and holds very well.  Another very common knot is known as the "granny knot".  It is something a lot of novices end up tying when first trying to tie a square knot and do it wrong.  You want to avoid using a granny knot because they don't hold very well.  Take the time to learn the right way to tie knots and to learn some of the kinds of knots you may need to use.  If you are tent camping or using awnings where you need guy ropes, you will want to learn how to tie a taut line hitch.  This knot holds well but allows you to adjust the tension as needed to keep your tent or awning tight.  Taut line hitches or a variation called a "truckers haul" or "truckers knot" are useful for tying down OHVs, tents, awnings, tarps, etc.   It not only is easy to tie and untie and easy to adjust, it works a little like a block and tackle to give you a mechanical advantage to pull things tight.  I have seen variations of ways to tie this knot but they all yield the same results:  easy to tie and untie, secure, easy to adjust, and a good way to pull the rope tight.  Here are some of my favorite knots for camping and sailing.

Tie one on!